
It can be a little bit unsettling when you hear yourself sing.
Especially when you are trying to record some takes for the song that you are working on.
There are so many things that you have to concentrate on when you are giving a vocal performance,
and you don’t need any additional distractions.
To not hear yourself in FL Studio, you need to disconnect the Insert Track that you have set up to record on from the Master Channel. You can do this by following the green line at the bottom of the Insert track to the Master Channel. Left click on the end that is connected to the Master Channel. This will remove the sound from that insert being sent to the Master channel, but there are some other things to consider.
I think that ultimately it is a good idea to get used to hearing yourself singing in your headphones, but when you are first starting out, it can be nice to take away the distraction.
So I’m going to walk you through what you need to do in order to setup a headphone mix in FL Studio where you don’t have to hear yourself sing.
You will just be able to focus on the music, and nothing else.
PICK AN EMPTY INSERT CHANNEL
So let’s break down how to set up the mixer channel so that you don’t hear yourself when you are recording your voice in FL Studio.
First things first:
Make sure that you are setting up to record your vocals on one of the empty insert channels in the mixer.
DO NOT set up your mic on the MASTER channel. This will give you all kinds of problems and headaches that you don’t need right now.
SETTING UP THE CHANNEL ROUTING
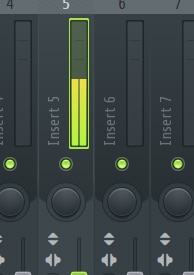
Pick an empty insert channel in the mixer.
Let’s go with INSERT CHANNEL 5.
At the bottom of the channel, you will see a neon green line.
It will be going from the bottom of channel 5 all the way to the MASTER channel on the far left of the mixer rack.
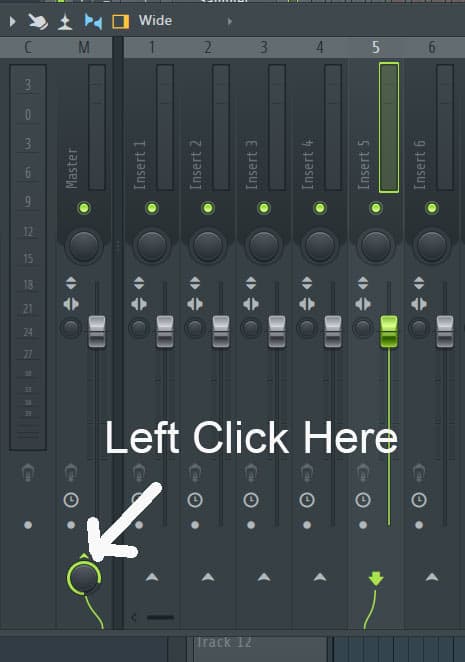
Follow that green line to the knob it connects to on the MASTER channel.
Then left click on the knob in the MASTER channel.
Now INSERT 5 is disconnected from the MASTER channel, which means that no audio will be flowing from INSERT 5 to the MASTER channel.
That means you won’t hear your voice in your headphones.
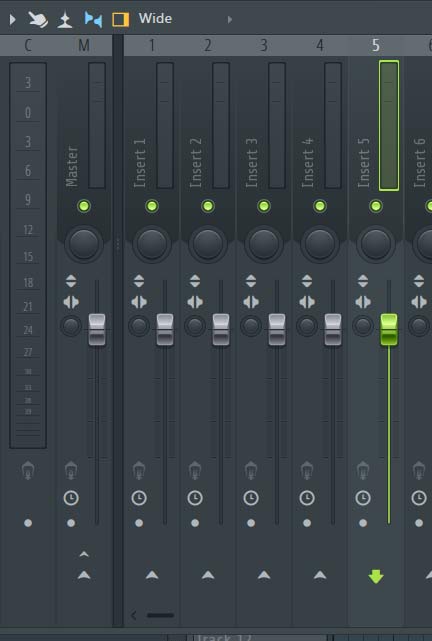
BUT, we can still setup to record from this channel.
Which means that we can hear everything that is going on with the music,
but we won’t have to hear the voice that we record on Channel 5.
Alternative to Disconnecting
I think that it is a good thing to get used to hearing yourself sing in the microphone.
So my recommendation instead of disconnecting, is simply to turn down the level that is being sent to the Master channel from Insert 5, or whatever insert you set your mic up on.
You would do this by following the green line from insert 5 to the Master channel, and then turning that knob down to a level that feels comfortable for you.
This means that some of the vocal will be in your headphone mix, but only the amount that you want.
SETTING UP THE INPUT SOURCE FOR RECORDING
There are a few other things that we need to check and make sure are set up correctly before we start laying down the vocals.
On the right side of INSERT 5, we need to look at the top drop down menu that states IN.
Make sure that you select the microphone channel that you are using on your audio interface.
Choose the mono input, not the stereo input.
This will keep the audio from recording on just the left or right side,
depending on whether you are plugged into channel 1 or channel 2 on your audio interface.
Then dial in the mic preamp to make sure you are getting a good signal coming through the audio interface into the mixer channel.
I typically aim for about the halfway point on the meter.
This is a good rule of thumb.
ARMING FOR RECORDING
LAST thing to do is arm the track for recording.
You can right click on the circle at the bottom on INSERT 5.
This will bring up the file browser, where you can name the file and choose the location you want it to be saved to.
TRANSPORT CONTROLS AUDIO SETTINGS
NEXT, we need to make sure that audio is set to be recorded when we press the record button in the transport bar in FL Studio.
Right click on the record button, and make sure that the selection for audio is checked.
CHECKING THE AUDIO INTERFACE SETUP
Here are a couple of things to check on the audio interface.
I’ve talked with a few people, and have seen this happen in a couple of cases.
Look at your audio interface and see if it has a knob or button that will allow direct monitoring.
This is a selection that will allow you to either focus only on what is coming from the interface into the computer, or to focus on what the computer is sending back to the interface.
What this means is that you can go through all the steps listed above, but you might still hear your voice if the direct monitoring knob is setup to hear what is coming from the audio interface.
On my interface, the direct monitoring knob is called Mix. One side of the knob says input, the other side says playback.
Turning the knob to the input side means I’m monitoring what I’m recording on the audio interface. Turning to the playback means I’m monitoring what’s coming from the computer.
So in order to make sure I’m hearing the headphone mix I setup in FL Studio,
I need to make sure I have the knob turned all the way to the playback side.
Now all you have to do is press record.
You can click on the record button, or use the shortcut key of R to start the recording.
Once you are finished, you can press the spacebar to stop the recording.
CONCLUSION
So let’s go back over what we covered
Step 1 – choose an insert channel that you are going to record on
Step 2 – disconnect from the master channel
Step 3 – select the mic input from the drop down menu
Step 4 – arm the track for recording select the file location
Step 5 – setup the transport controls
Step 6 – setup the monitoring on the audio interface
Step 7 – record that amazing vocal performance
This process of setting up a headphone mix is just one part of the vocal production process. If you want to learn more about vocal production, then be sure to check out this next article on vocal editing.
And if you want a cheatsheet for vocal mixing, then I have a PDF you can download that will walk you through the basics of getting a good vocal mix.