I can feel daunting to figure out how to use FL Studio when you are a beginner.
Especially the first time you open up the program.
There is usually a project that is loaded by default. Every window is open and you can see the amount of files that are in the playlist, with all the crazy colors and automations going on.
It can make you want to give up before you get started.
But that’s not what we want to have happen.
I want help.
I’m going to walk you through the basics of how to use FL Studio.
We’re going to cover what you need to know in order to feel comfortable with producing a song in FL Studio.
This is going to take you from knowing almost nothing about the program to feeling comfortable navigating around it to make a song.
Sound good?
Great, let’s get started.
HOW TO USE FL STUDIO
Let’s start with the most common spaces in FL Studio.
THE MAJOR WINDOWS
So if your program opens up with a default song, chances are it looks something like this:
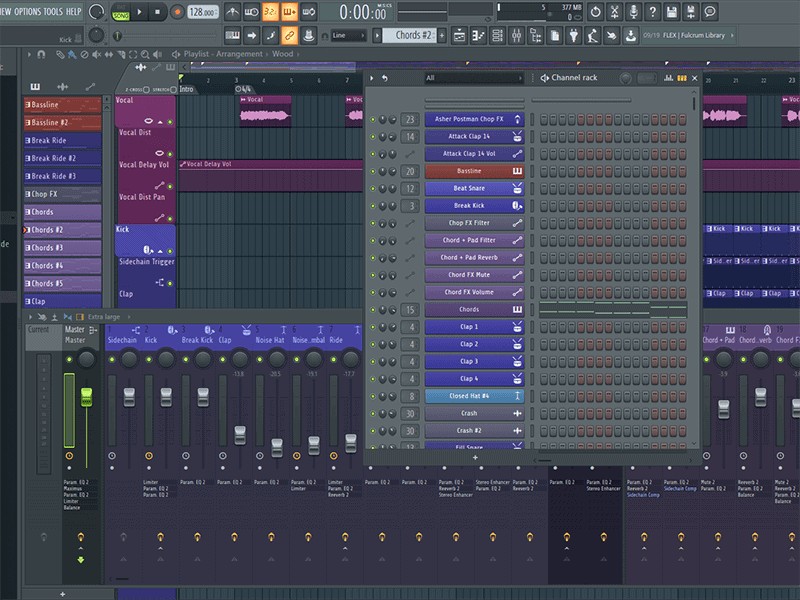
Yikes.
That’s a lot to take in when you first start.
Don’t get me wrong, I think it’s great to be able to see what the program can do.
But trying to go from zero to 60 in 2.5 seconds can feel a little overwhelming.
So let’s look at a starting point for all of this.
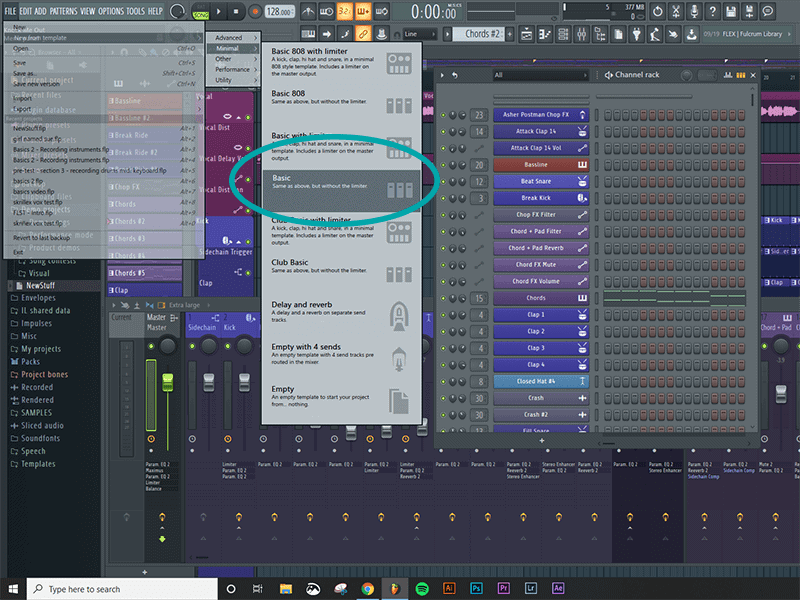
Go up to file, new, new from template,minimal, basic.
It will look like this:
And then press F12. It should close all the windows that are open except for the channel rack and the Browser window on the left side.
It should look like this:
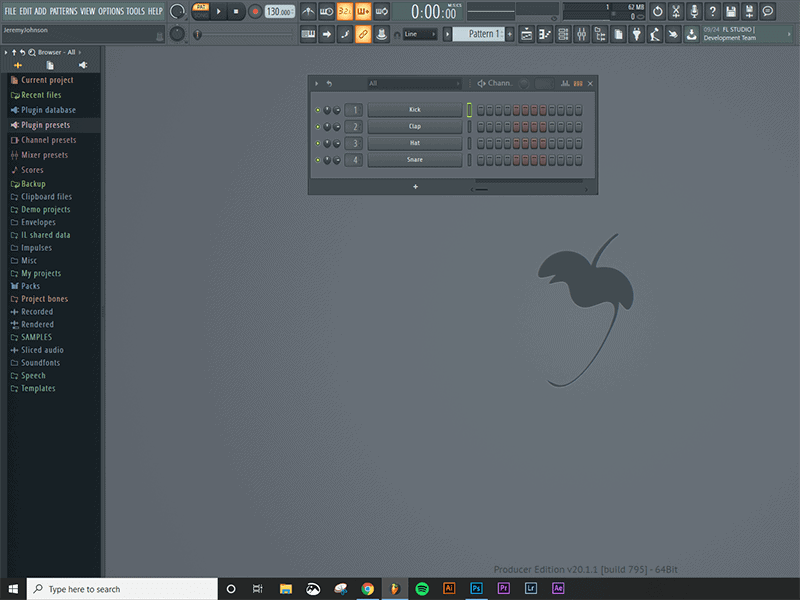
This will start us from the same point.
This is a blank canvas with almost nothing loaded in.
So now let’s talk about the windows.
You have a couple of major windows that you will spend most of your time in:
- Playlist window (shortcut key – F5)
- Channel Rack (shortcut key – F6)
- Piano Roll (shortcut key – F7)
- Mixer Window (shortcut key – F9)
- Browser window (shortcut key – ALT + F8)
You can practice opening and closing each of these windows by using the shortcut keys.
Once you get an idea for what they look like, you can press F12 to close everything except the channel rack and the browser window.
Let’s start with the browser window.
BROWSER WINDOW
This is the library for FL Studio.
It shows up on the left side.
These are all the files and folders that FL Studio can pull from to help you start putting together your songs.
If you want to use an analogy, you can think of it like going to Lowe’s or Home Depot for a home project you are working on. This is where you go to get the raw material for building a house, or in our case, a song.
You can go here to pull in all the things that you will need to make a complete project.
And chances are you will have to make several trips back and forth in order to get all the tiny little odds and ends you need to finish your project.
You and open and close the window by using the shortcut keys: ALT + F8
Do it once it will close it, do it again, and it will open.
That’s usually a good starting point.
You will bring in drum samples, instruments, settings, etc. from here.
The next place we are going to talk about is the Channel Rack.
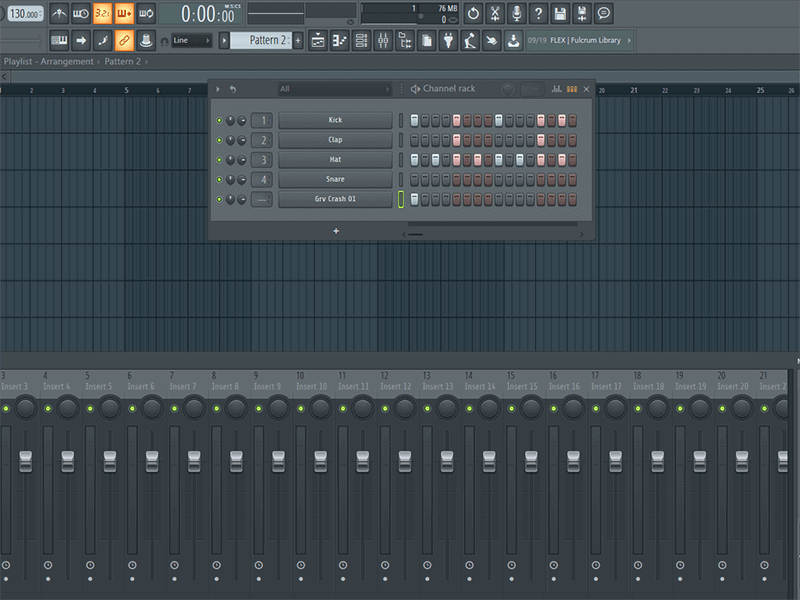
THE CHANNEL RACK
The channel rack is the place that you put all the samples and instruments that you pulled from the Browser window.
F6 will be the shortcut key that will open and close this window.
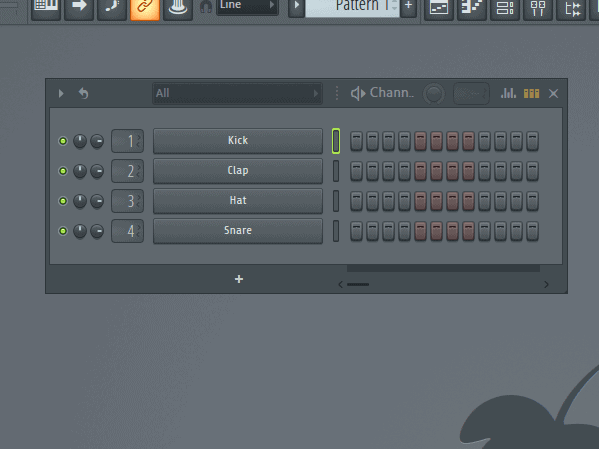
The channel rack looks like this:
So when you start a project, you start to gather all the things you need into this.
Going back to the Home Depot analogy, you can think of this as the staging area for the project you are about to work on.
You brought all the raw material home from the store, and now you need to store it somewhere, and start thinking about how you are going to put it all together to start completing this project.
The way that we start to put the project together is what are called patterns.
You’ll notice there is a window that is at the top of the screen that is called pattern, and by default it starts at 1.
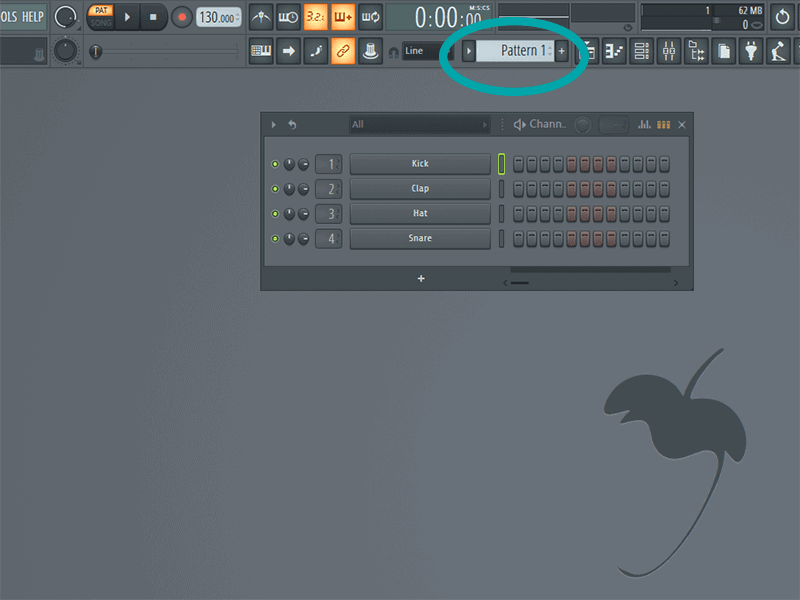
So let me show you how the patterns work.
Right now in the channel rack, by default you will see 4 samples that are loaded.
There is kick, snare, clap, and hi hat.
So let’s left click on the buttons in the channel rack so that the pattern looks like this:
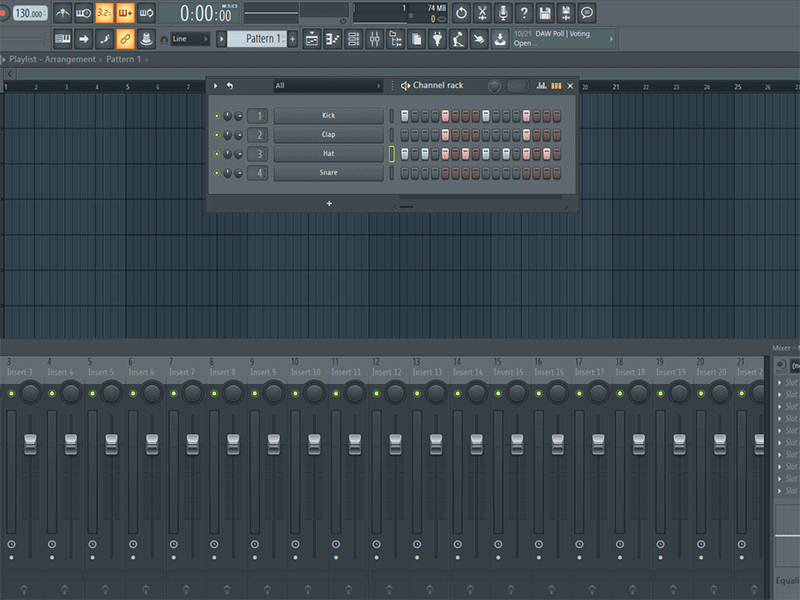
When you left click a button it turns a lighter color. This is letting FL Studio know when you want it to play a sample.
If you mess up or change your mind about the pattern that you want to make, you can right click on any of the buttons that are lighter and it will change back to the default color.
If we press the play button in the transport bar, you will hear the pattern play.
You can press the space bar to stop the pattern from playing again.
So now you have created your first pattern.
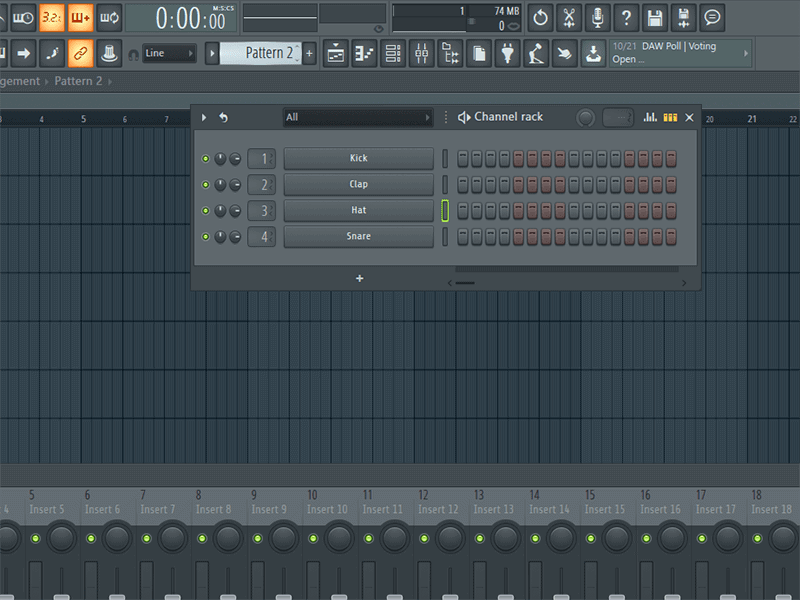
NEXT PATTERN
Go up to the pattern window and left click and drag the pattern number up to 2.
You will see that the channel rack goes back to the default state.
So what happened?
Well we have to be able to make lots of different patterns in order to make a song.
So each pattern is a part of the song.
Back to the home depot analogy, it’s like a shed project.
To build a shed, I’ll need windows, doors, framing, roof, siding, etc.
Each of these are different parts, but they make up the shed when they are all put together.
So let’s make another pattern.
This time let’s change it up a little bit.
Let’s add a new sample, and let’s make the pattern look a little different.
To load a sample, let’s go back over to the Browser window …
I am going to navigate down to PACKS, drums, cymbals- and let’s look for the sample named GRV Crash 1.
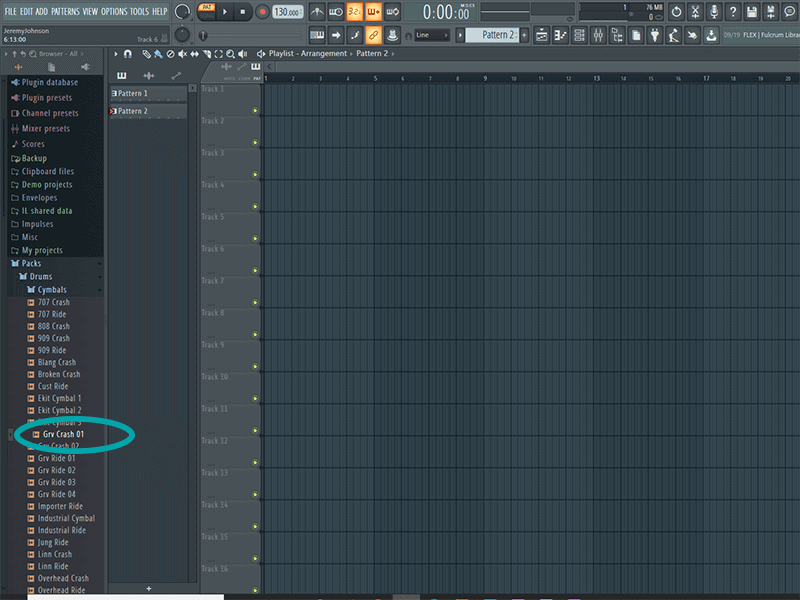
Now I have a couple of options. I can left click and drag the sample underneath the other samples that are in the channel rack.
OR
I can right click and choose the option that says “open in a new channel”.
Either of these will place this new sample into the channel rack so that I can use it.
If I switch back to pattern 1 you will see that the new sample we loaded is there. I just say that to let you know that the samples will be visible from every pattern.
So let’s go back to pattern 2.
Let’s lay in a little bit of different pattern this time. We’ll change the kick up a little bit, and we’ll add in the crash so that it starts right when the pattern starts.
Let’s make it look like this:
You can listen to what you have created by pressing the SPACE bar on your keyboard.
This the shortcut key for the Play/Pause button for FL Studio.
So now we have two patterns.
So what’s the big deal, you might ask?
This is the start of building a song …
So let’s move over to the next major window, the playlist.
THE PLAYLIST
To get to the playlist, press F5 on your keyboard.
You should see a window that looks like this:
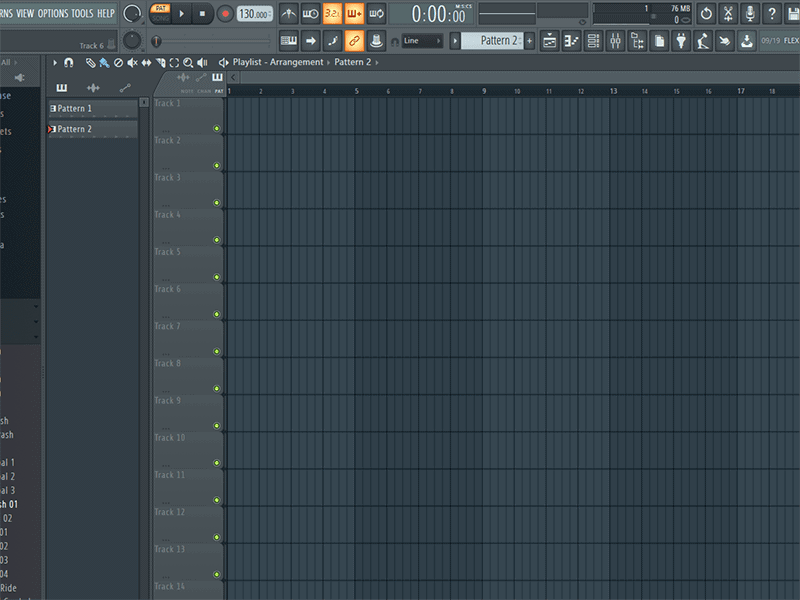
And if you look on the left side of the window, you should see pattern 1 and pattern 2.
We can now take these two patterns that we just created and start to build out a song.
So if you select pattern 1,
Then use the brush tool (shortcut key B) that is selected by default in the playlist window, and left click.
This will place the pattern down on the grid.
Next let’s left click on pattern 2 and place the pattern after pattern 1 on the grid.
Now it should look like this:
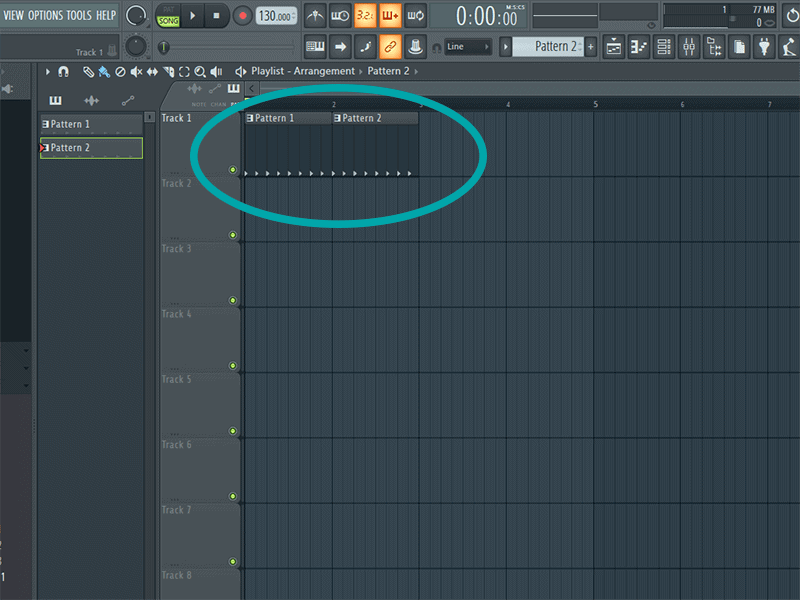
And then let’s repeat the process so that it looks like this:
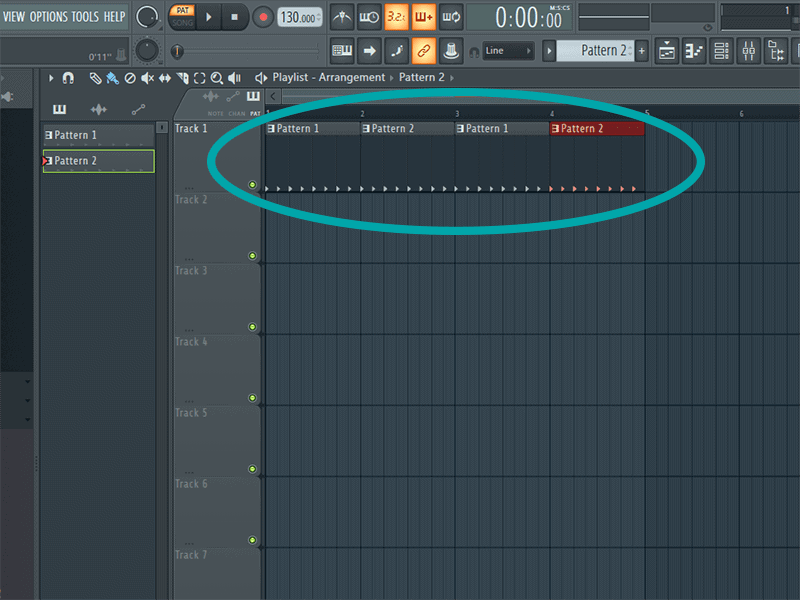
Now we have 4 patterns that have been placed in the playlist.
This tells FL Studio what patterns to play at what time.
And this is the first part of creating a song.
So let’s change from pattern mode to song mode in FL Studio.
You can see what mode you are in by looking at these boxes that are next to the transport bar at the top of the program.
They look like this:
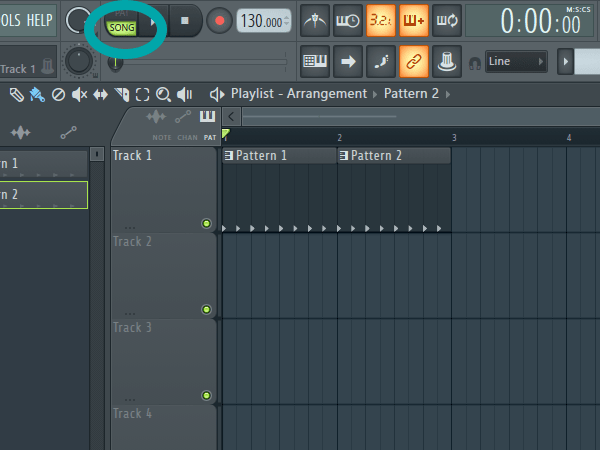
If the orange PAT button is highlighted, you are in pattern mode.
If the green SONG button is highlighted, you are in song mode.
To change between the modes you can press the L button on your keyboard.
So let’s change to SONG mode.
Now press the space bar.
You should see the cursor appear on the playlist, and the patterns will play as the cursor moves through the 4 patterns that we just laid down.
Pretty cool right?
So now we have laid down some drums for our first song.
We should probably add in a bass.
Let’s do that next.
BACK TO THE CHANNEL RACK – CREATING A BASS LINE
So we need to add in a bass for our project.
For this example I’m going to use the Sytrus plugin, which is a native FL Studio plugin. It’s a synth, which is a digital instrument that can generate all kinds of sounds.
So go over to the browser window.
Let’s click on the PLUGIN PRESETS folder
Then choose the GENERATORS option.
And then let’s move down to the Sytrus folder.
Choose the BASS folder.
And then select the DEEP preset.
Left click and drag that into the channel rack below the existing samples.
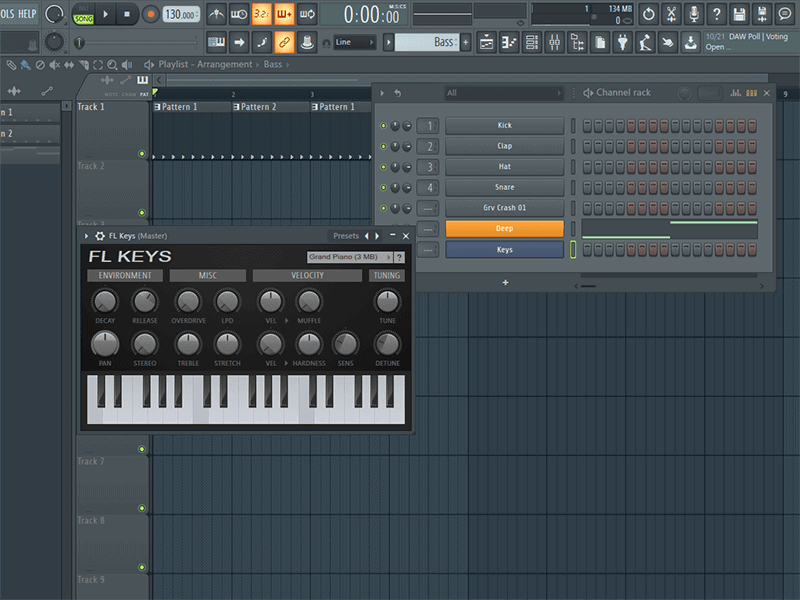
You should see a window pop up that looks like this:
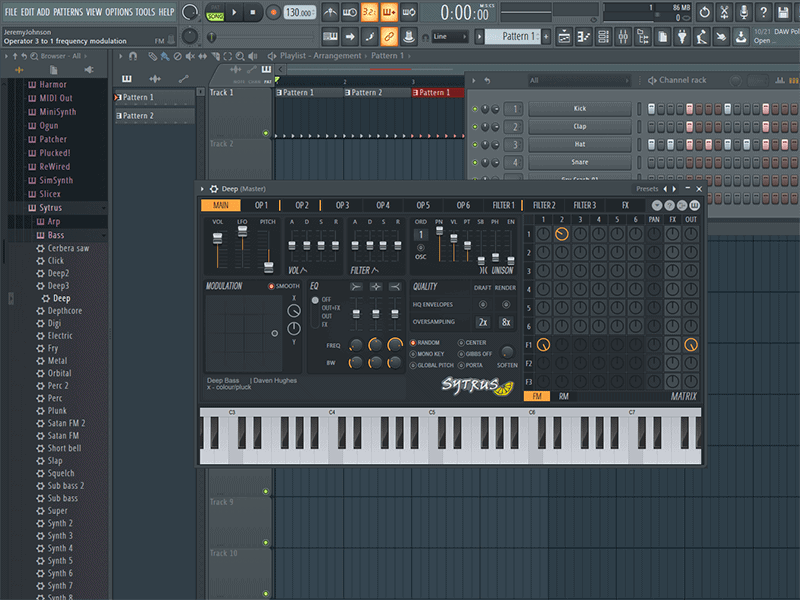
That is the Sytrus instrument, and all the buttons and knobs can be used to control the sound that you get out of it.
PATTERNS FOR INSTRUMENTS
So here is the catch.
If we try to create the bass line the same way we created the drum pattern, we won’t get the results we are after.
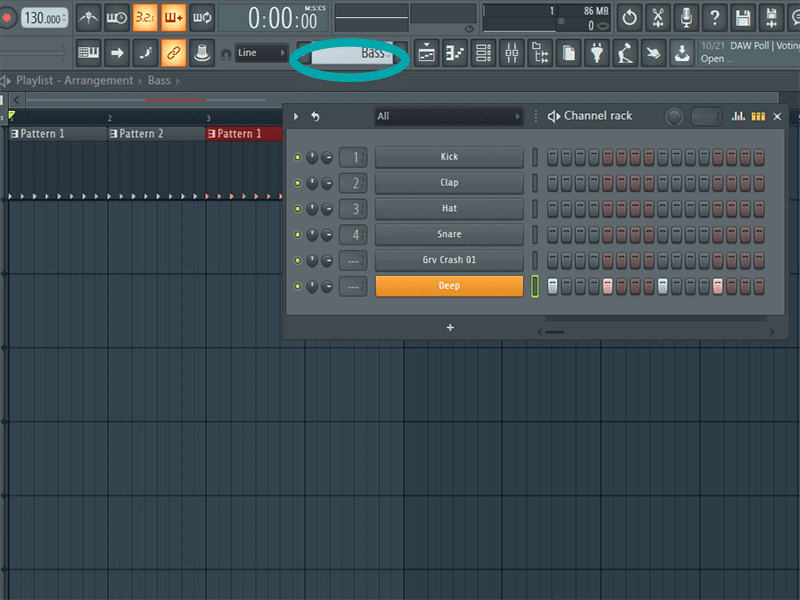
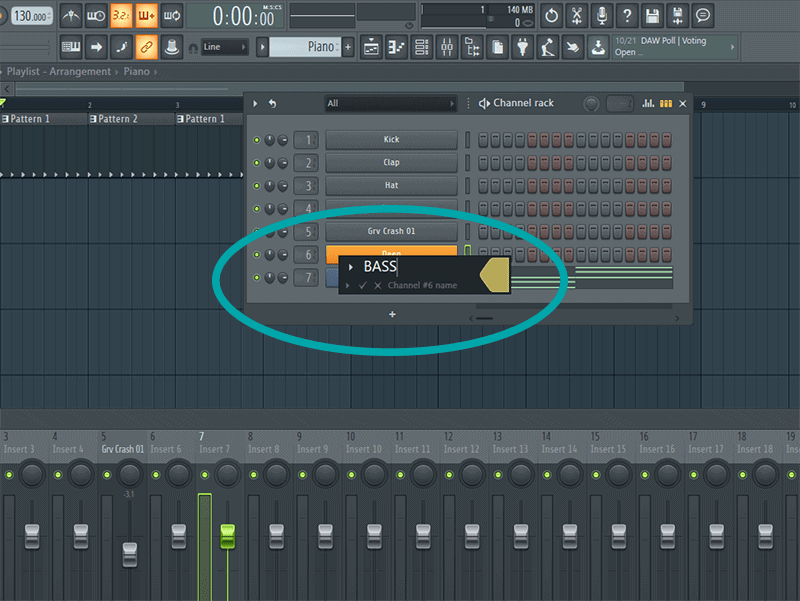
Let’s press F4 on the keyboard. This is the shortcut key that opens the next empty pattern.
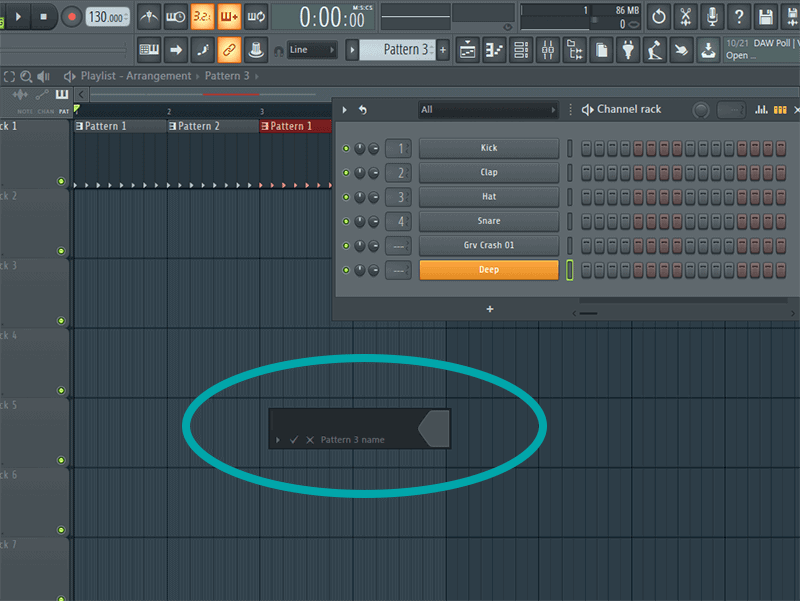
and allows us to name and color it.
Let’s name the pattern BASS. And then press the enter key. You’ll notice that where it used to say pattern 3, now it says Bass:
And then let’s left click a few buttons on the sytrus channel, like we did with the drums
Make sure we go back to pattern mode, and then let’s play the pattern we just created.
All you are going to hear is one note.
That’s not going to work.
So right click on each of the buttons that we highlighted on in the pattern to remove them.
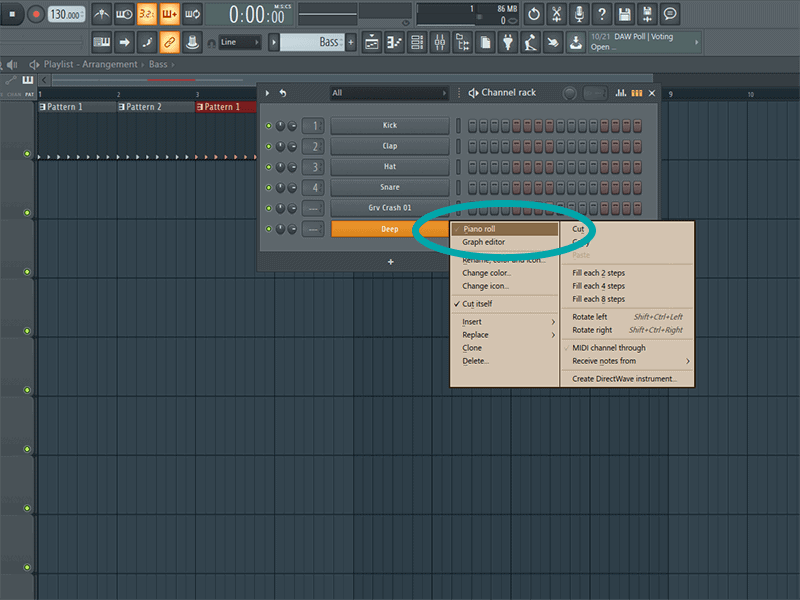
Now, right click on the sytrus instrument in the channel rack. That will open up a window that looks like this:
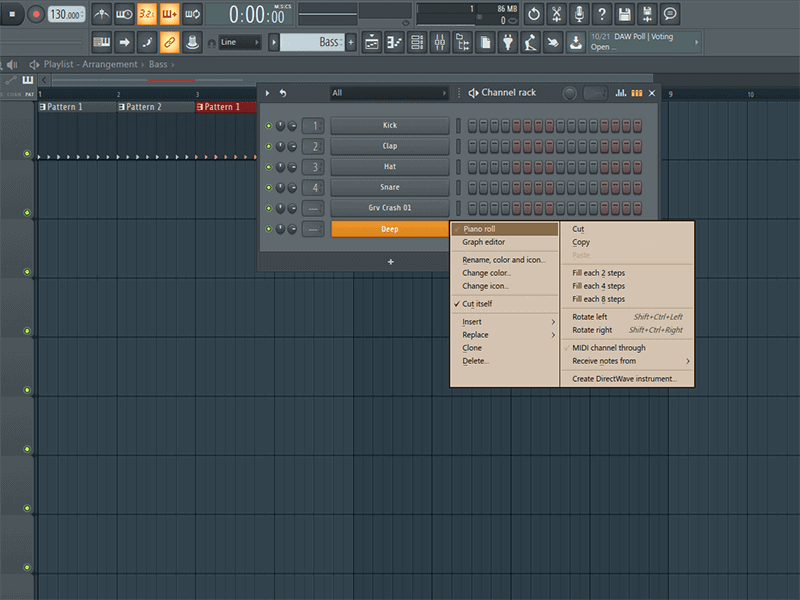
And we are going to choose the option that says Piano Roll:
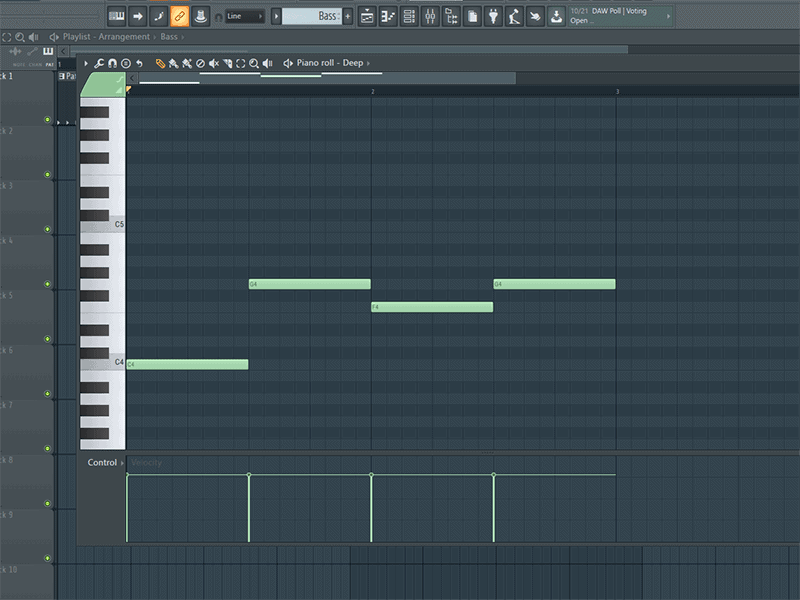
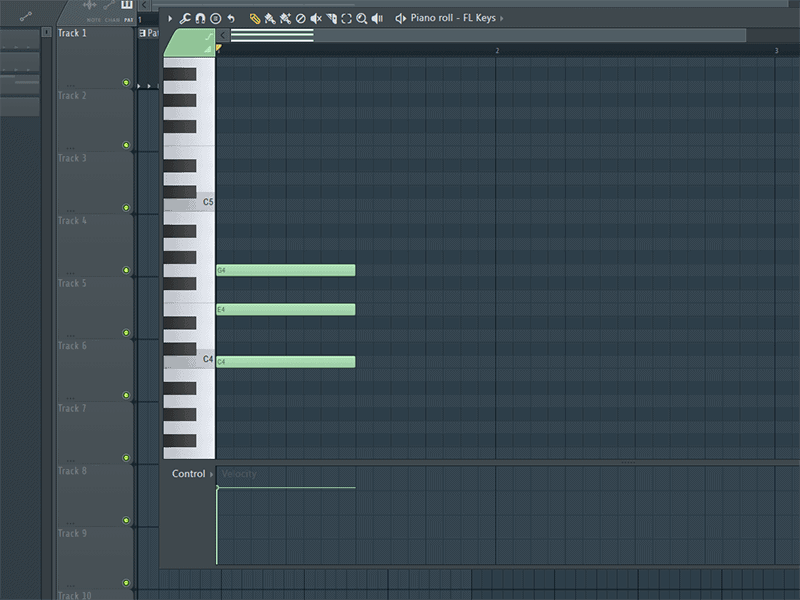
This will open up the Piano Roll window.
It will look similar to the playlist window, but will have a keyboard all along the left side of the window.
If you left click on any of the piano keys, it will play the note on the bass.
If you then left click on the open area to the right of the note, a green bar will appear.
This is telling FL Studio what note to play, and when to play it in the pattern.
You can left click and drag the right side of the note to make it longer or shorter.
Let’s go ahead and create a simple pattern that looks like this:
Now make sure that you are in the pattern mode by pressing L until you see the pattern mode button light up.
Then when you press the space bar, you should hear the notes play on the bass.
Pretty cool, right?
You have just created your first instrument pattern in FL Studio.
So now let’s take this even further.
CREATING A CHORD PATTERN
Let’s get the channel rack back up by pressing F6.
Then click the + icon down at the bottom of the window.
This will open up a menu that lets you choose what instrument you want to put into the channel rack.
Let’s find the FL Keys plugin.

When you select that, the new instrument will open in the channel rack.
Now let’s press F4 again to create a new pattern, and name it piano this time.
Then right click on FL Keys and choose the Piano Roll option.
This time instead of just picking out single notes like we did with the bass, we are going to put together several notes, and create chords.
These will be very simple chords.
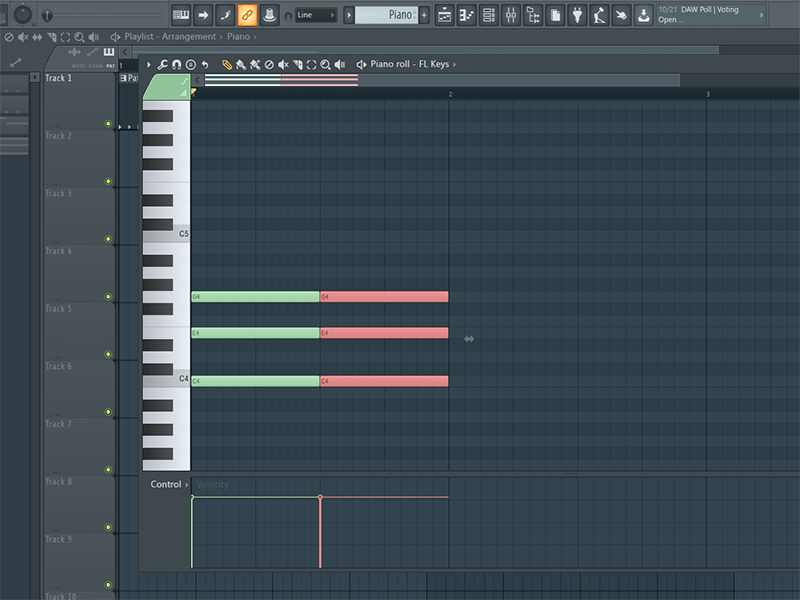
So let’s start by making a chord that looks like this:
This will be the first chord in the progression that we are creating.
It’s a major chord.
Now hold down CTRL and left click and drag around the notes that you just made.
You should see the notes turn red when you let go of the left mouse button.
Then press CTRL + B.
This will make a duplicate of the chord you just made.
Now we are going to shift this chord up, let’s hold down the SHIFT key and use the UP ARROW.
This is going to move the entire chord.
So let’s get that chord set here:
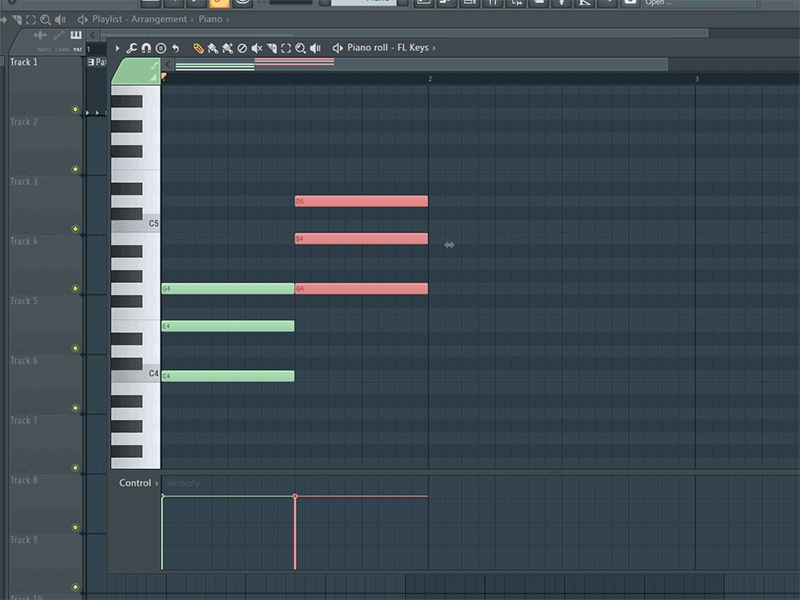
And let’s repeat that same process two more times.
And then we will have a chord progression that looks like this:
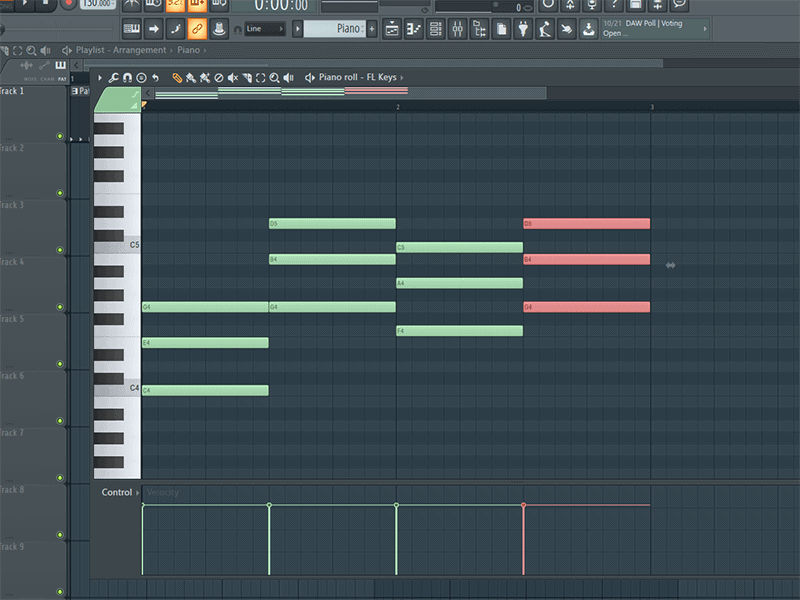
When we press the space bar, you should hear a chord progression.
Great job!
Now let’s go and put these pieces together in the Playlist.
THE PLAYLIST…
So now that we have created a bass line and a chord progression on the piano, let’s open up the playlist by pressing F5.
You should see the drum patterns that we created earlier.
And now on the left side of the window you should also see a pattern called bass, and one called piano.
Let’s select the bass first, and let’s put that on the playlist, like this:
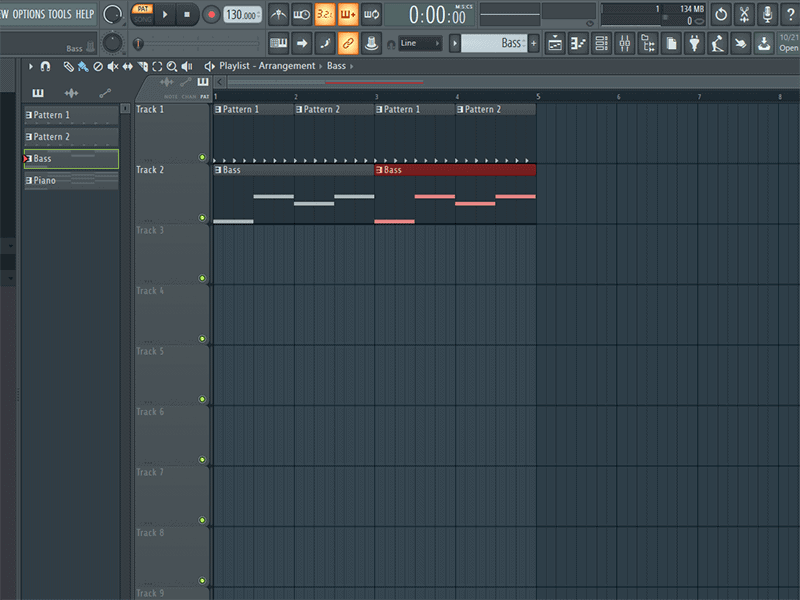
And then let’s select the piano pattern and place it on the grid like this:
Make sure that you move back to song mode, by pressing L on the keyboard.
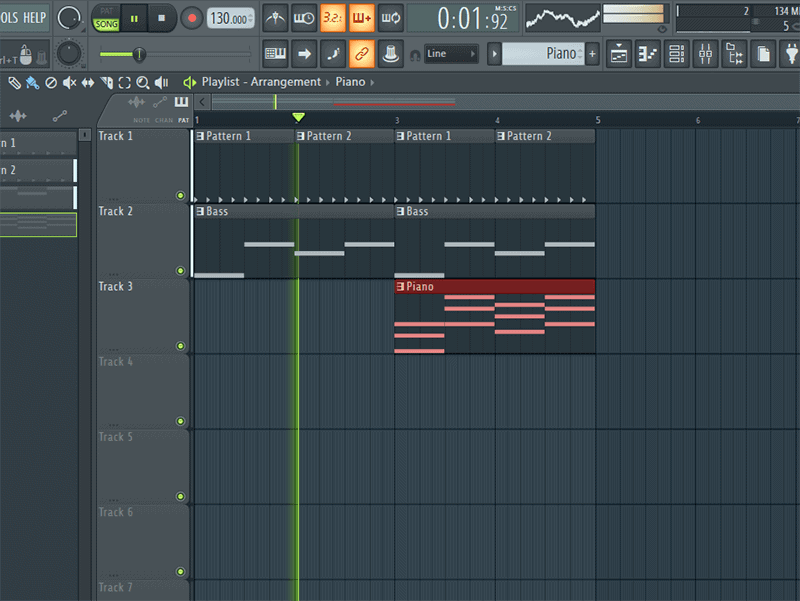
And now when you press play, you should hear all the layers play.
You will hear the drums and the bass come in together, and then the piano will start to play after that.
FL Studio is following the arrangement that you have created so far with the patterns that you made. And it is playing them in the order that you told it to.
This is how you create songs in FL Studio.
You create patterns with different instruments, and then you arrange those patterns in the playlist until you have created a song.
That at its most basic level is how you create songs!
You are on your way to creating your very first song!
ORGANIZING YOUR FILES
So we’ve made a few patterns and we have put them together in a basic arrangement.
Congratulations.
Now let’s talk about something a little more mundane, but still helpful.
As you start bringing in more instruments and creating more patterns, things can start to get a little confusing.
So sometimes it helps to clear things up by adding in a little bit of organization to keep you working towards your goal of great songs.
So let’s take the instruments and the patterns that we have already created and organize them a little bit.
NAME AND COLOR CODE – CHANNEL RACK
Pull up the channel rack by pressing F6.
No let’s go down to the Sytrus channel that we created earlier.
Right now it’s bright orange, and the name says Deep.
But to help us be a little more organized, let’s rename and color the channel differently so that we will be able to recognize it more easily as the project gets bigger.
So right click on the button that says Deep.
Then choose the option that says “Rename, Color and Icon”
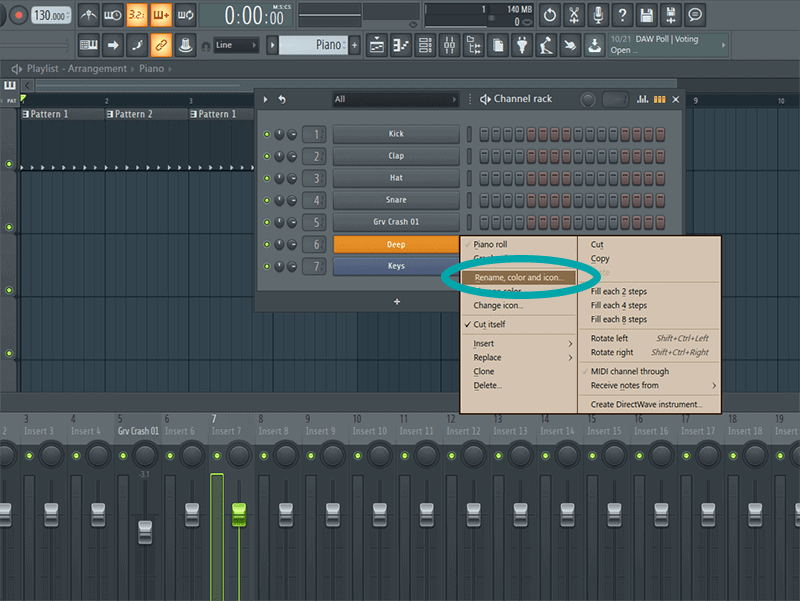
This will bring up a small box that looks like this:
In this instance, I am going to name the instrument Bass, since that is what I am using it as in this project.
And then I am going to left click on the gray patch at the end of the box.
This will bring up a color palette where we can choose a new color.
In my tracks I always use a Golden Color for the Bass.
I do this to make it really easy visually to see what instrument is where.
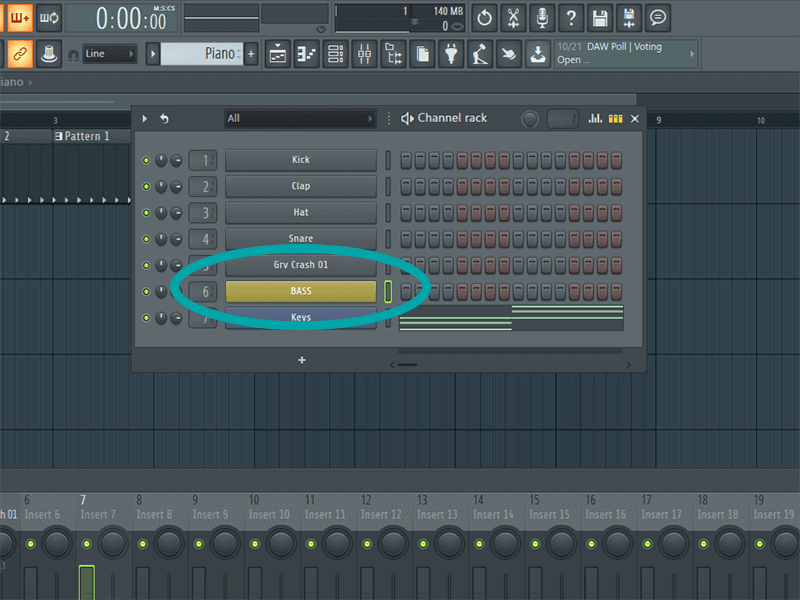
So now that we have renamed the instrument and chosen a new color, press ENTER.
Now the channel should look like this in the channel rack.
You’ll notice on the left side of the channel rack, there is a number that is in front of the original drum samples that we had in our project.
The kick has 1, the clap has 2, the hi hat 3, and the snare 4.
Those numbers correspond with channels in the mixing rack.
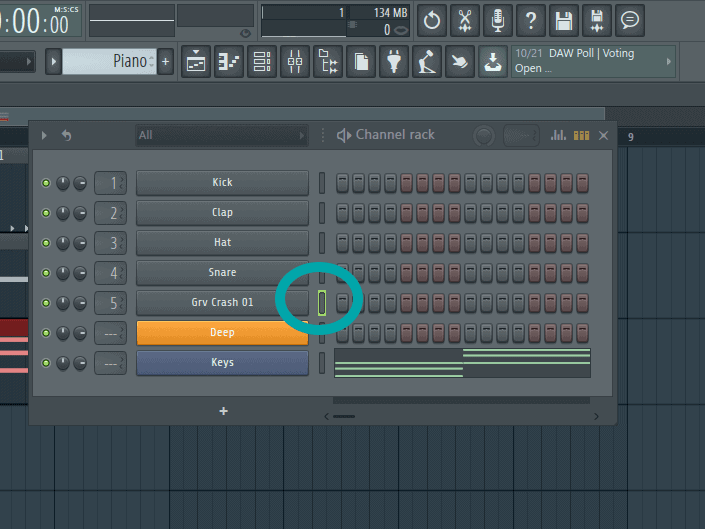
So go over to that window where there is no number on the crash that we loaded into the project.
Left click and drag up and you will see the number go up, drag down and the number will go down.
Let’s leave the number blank for now, but make sure that the button next to the crash button is highlighted in green by clicking on it.
Now press F9 to bring up the MIXER WINDOW
BASIC MIXER ROUTING
Let’s click on INSERT 5 on the mixer rack.
This is the next available channel on the mixer that is not being used.
Now press CTRL + L.
You’ll see the name of the sample we highlighted in the channel rack has shown up where it used to say INSERT 5.
We have routed the crash to INSERT 5 on the mixer.
Now let’s go back to the channel rack by pressing F6.
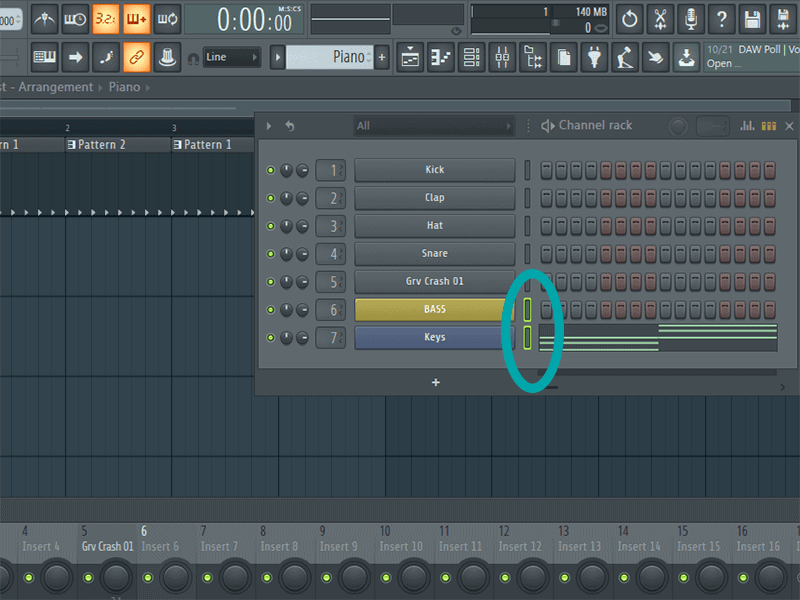
Left click on gray box by the Bass Channel, hold down the SHIFT key, and left click on the gray box on the Keys Instrument.
The highlighted boxed should look like this:
Now flip back over to the Mixer by pressing F9 again.
Left click on INSERT 6.
This time press CTRL + SHIFT + L.
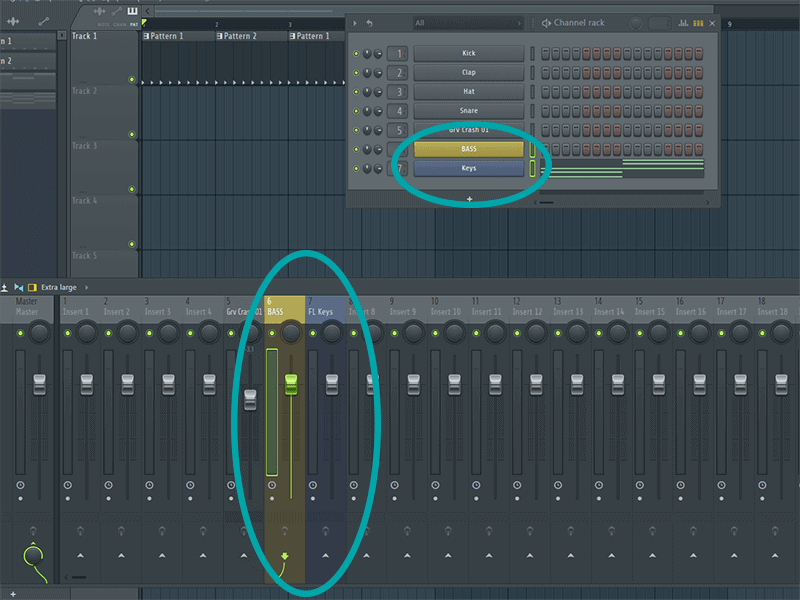
You will see that INSERT 6 and 7 have now been converted to Bass and Keys and have taken on the color of the instrument from the channel rack.
Press F5 to bring up the playlist.
Then press F9 to bring up the mixer on top of the playlist.
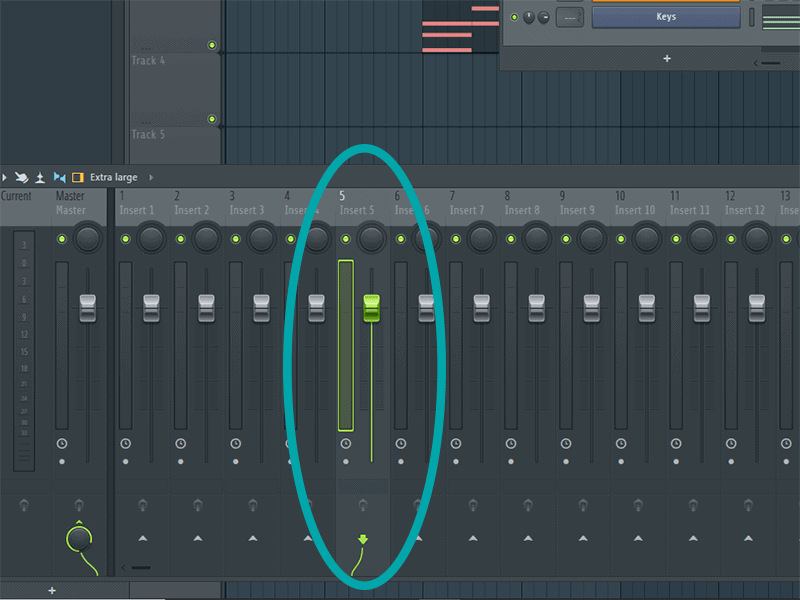
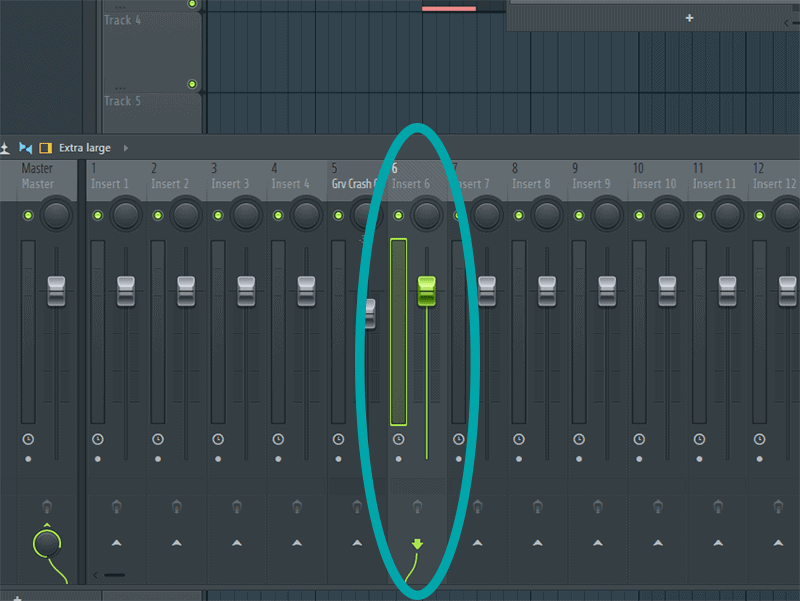
Press the space bar to start playing the song, and you will see that each instrument is now routed to its own mixer channel.
And we can now control the volume of each element independently using the fader.
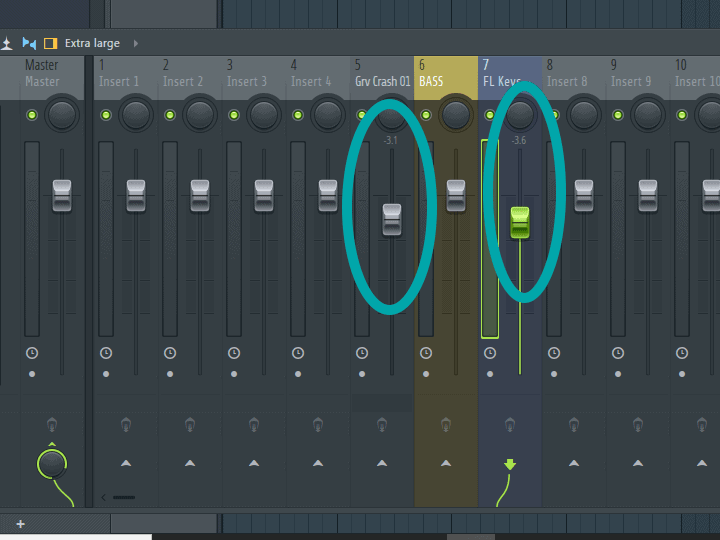
So let’s cut the crash volume down a little bit.
Left click and drag down while you are listening in the song mode.
And then you can do the same for the keys. Cut them down until you feel like everything sounds pretty balanced, volume wise.
You have now started to do some basic mixing of a song.
Congratulations
CONCLUSION
So you have learned how to bring samples into a project.
You learned how to load instruments, and create patterns.
And now you know how to arrange those patterns in the playlist to create a song.
Now you also know how to organize the instruments and samples by color coding them and naming them, and we did some basic mixing on the song as well.
That’s a lot!
But it’s a great start to get you on your way to producing your own songs.
And now you know how to use FL Studio at a starting level.
I know I threw out a lot of short cut keys.
One last trick.
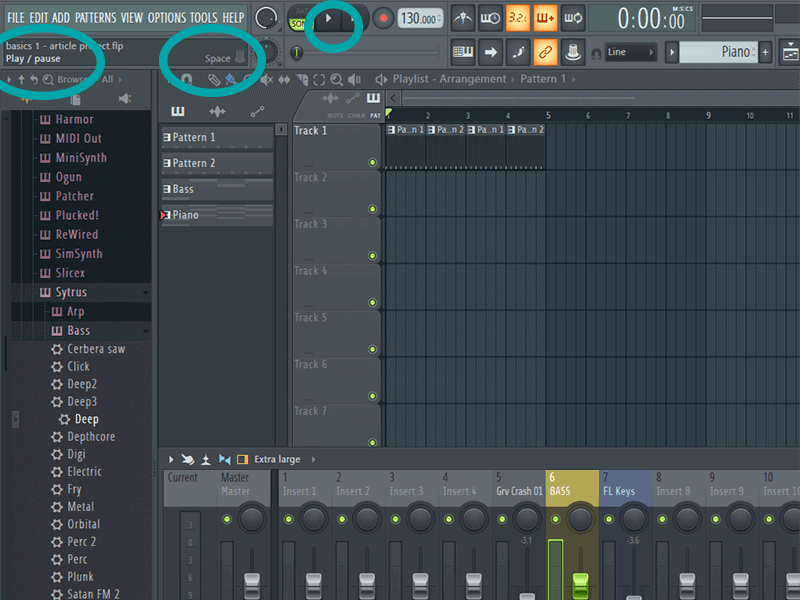
You can look up in the left side of the FL Studio window, and there is a box that tells you what the short cut keys are for different things as you hover over them.
I’m hovering over the play button, and it’s showing me that the shortcut key for that is the SPACE bar.
So use that to your full advantage.
Now if you read all the way to the end, you are trooper.
That is a lot of material to cover.
If you want to see me walk you and talk you through the same process, enter your email below, and it will take you directly to a video walkthrough of everything in this post.
If you are a visual learner, like me, you’ll probably get even more out of it!
Or if you want to learn more you can check out an article on how to setup a midi keyboard in FL studio, or how to record a vocal mic.