So you want to learn how to record vocals in FL Studio?
In this article I am going to show you four easy steps to get you recording in no time.
When you open up FL Studio the first time, it can feel a little overwhelming..
It seems a little daunting to figure out how to record vocals. There are so many windows, so many options.
How do you get started?
Trust me I’ve been there.
But don’t worry, I’m going to take you step-by-step through the process that I use to record vocals in FL Studio.
This is certainly not the only way. But it’s the method I use almost all the time.
I think the way you choose to record vocals in FL Studio will be dependent on the workflow that you choose.
Music production is a very personal things.
As you get more comfortable, you may find a different way to do vocal recording, and that’s completely fine.
NOTE: if you want to see how I produce music in FL Studio, you can check out the free course below
[thrive_leads id=’679′]
HOW TO RECORD VOCALS IN FL STUDIO
ASSUMPTIONS BEFORE WE BEGIN
There are a few assumptions that I am going to make up front to help clarify the process.
ASSUMPTION #1: I am going to assume that you are working on a desktop or laptop computer to record your music. I am working on a Windows 10 based laptop. So that’s where a lot of my examples will be drawn from.
ASSUMPTION #2: I am also going to assume that you are going to be recording through an audio interface as well. If this is not true for you, then you can look at some other options, like recording voice through a USB mic, or using your iPhone to do mobile recording. So let’s just get that out of the way before we start, so that there not a misunderstanding.
STEP 1 – SETTING UP THE HARDWARE
The Recording Studio Components for Recording Vocals
Here’s a brief list of home recording equipment that I use when I am going to record my voice in FL Studio.
This a good starting point to work from. And this is the list of equipment that I will be using in this guide.
ESSENTIAL ITEMS:
- Laptop or Desktop computer
- Audio interface
- Microphone – condenser or dynamic
- Microphone cable
- Pop Filter
- Mic Stand
- Pair of Headphones
CONNECTING ALL THE RECORDING EQUIPMENT
Let’s get all the recording equipment set up.
This brief video will show you how I connect all the items together before I start the recording process.
Before you connect your condenser mic, make sure that phantom power is off.
This can cause damage to a condenser microphone, and you definitely want to protect it.
Once the condenser microphone is connected is when you want to turn on the phantom power.
Not before.
If you are interested in seeing what products I use in my studio, you can go to the resources page.
I’ll show you what I have purchased and what I am currently using in my home studio to record and work on music production.
PLUGGING THE AUDIO INTERFACE INTO YOUR COMPUTER
Most of the smaller audio interface draw their power from the computer they are connected to.
These include USB, Firewire, and Thunderbolt audio interfaces.
So you shouldn’t have to plug them into a wall outlet to get them powered on.
Just plug the cable into the back the audio interface. And connect to the correct port on your computer. It should power on.
See if the computer recognizes the device.
Sometimes you’ll get lucky, and everything will work right out of the box.
Sometimes you won’t.
DOWNLOADING THE LATEST DRIVERS FOR YOUR AUDIO INTERFACE
It’s great if your computer recognizes your audio interface straight out of the box.
But it’s still a good idea to make sure that you have the latest drivers.
Open up Google and type in:
[manufacturer] [device name] driver.
In my case, I’m using the Presonus AudioBox iTwo, so I type in Presonus AudioBox iTwo Driver, like this:
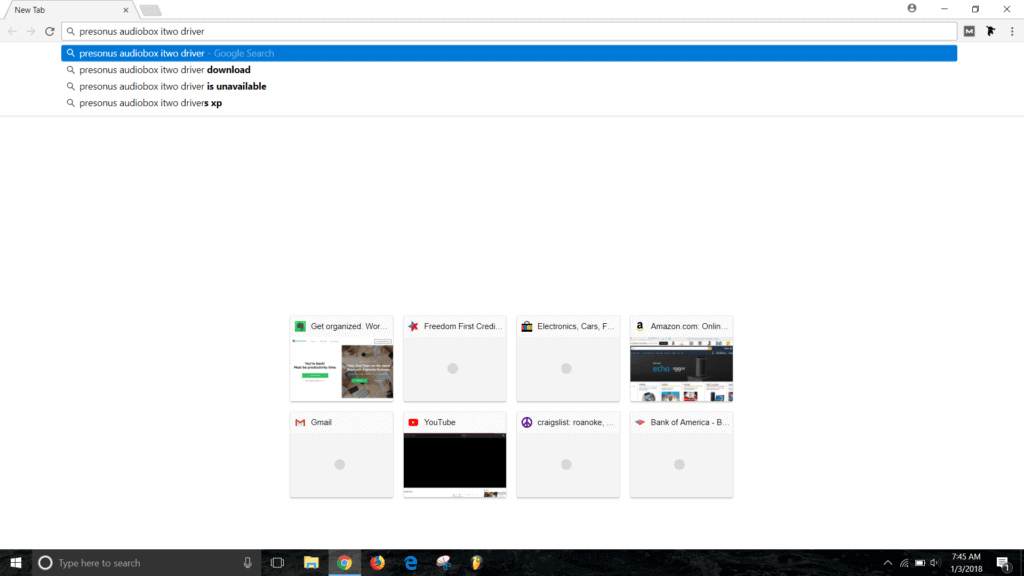
You will see the page that you can download the driver from in the top results.
Make sure it’s the manufacturer’s website, and not some crazy spammy site.
Select the correct driver based on your operating system and download it:
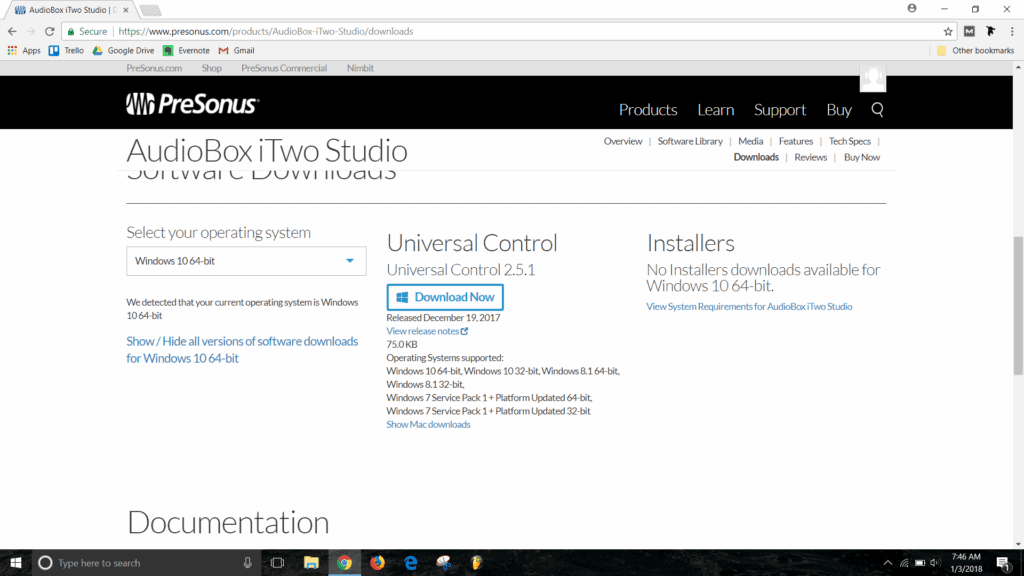
Once you download the file, install it.
*Unplug the device from the computer before you install the driver. Once the driver is installed you should be able to plug it back in and have the computer recognize the device.
After you the install the driver, there may be updates needed.
Common updates are firmware.
Run those to make sure you are all up to date.
Now let’s set up the audio interface in FL Studio.
STEP 2 – SETTING UP THE AUDIO INTERFACE IN FL STUDIO
Open up FL Studio.
Use the shortcut key F10 to open up the settings menu.
*By the way, learning short cut keys in FL Studio is one of the best things that you can do. It can speed up your workflow so much!
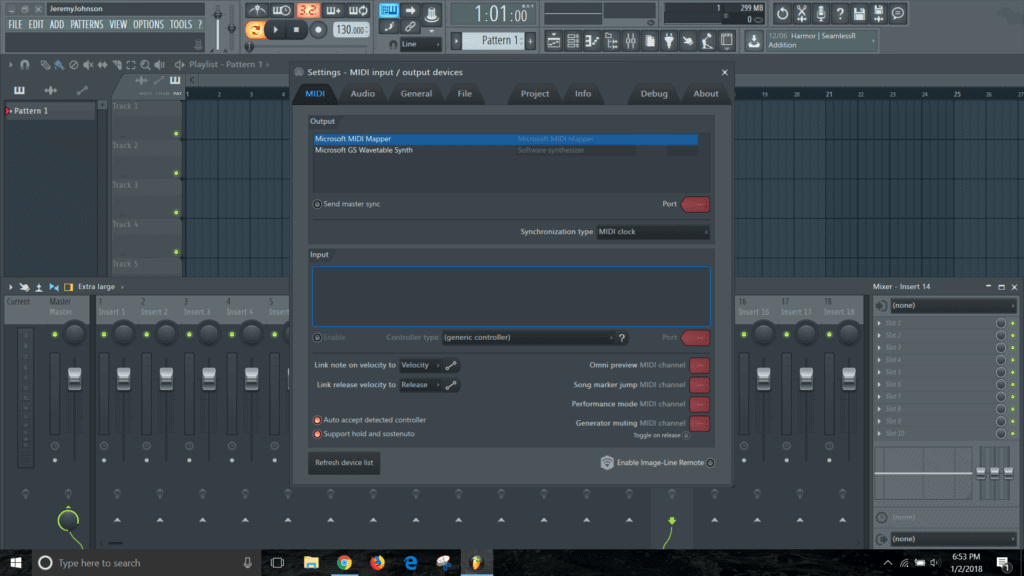
In the Settings window open, you are going to click on the Audio tab.
This is where we are going to make sure that FL Studio recognizes our audio interface.
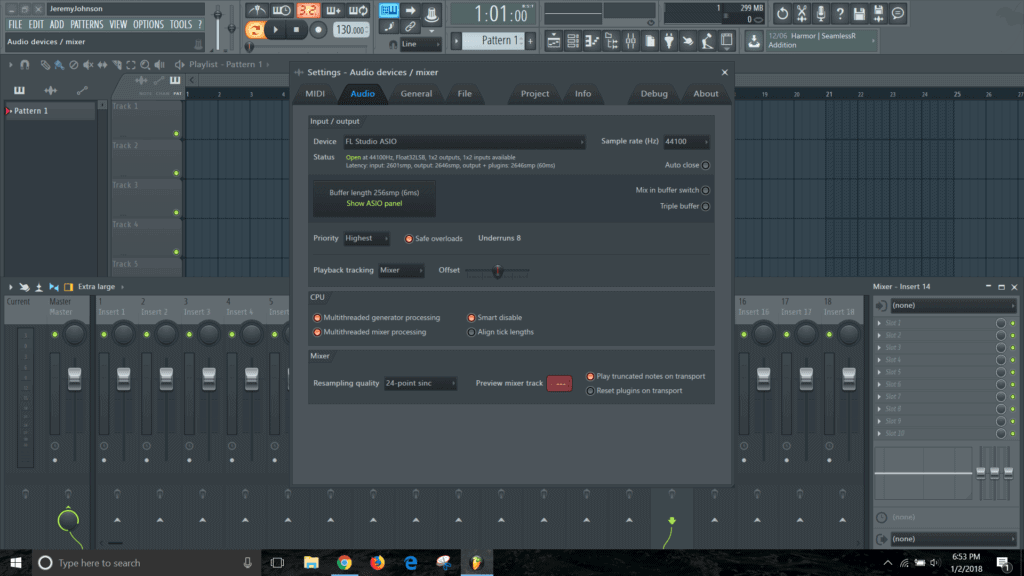
Look for the drop down menu DEVICE.
Click on that drop down menu:
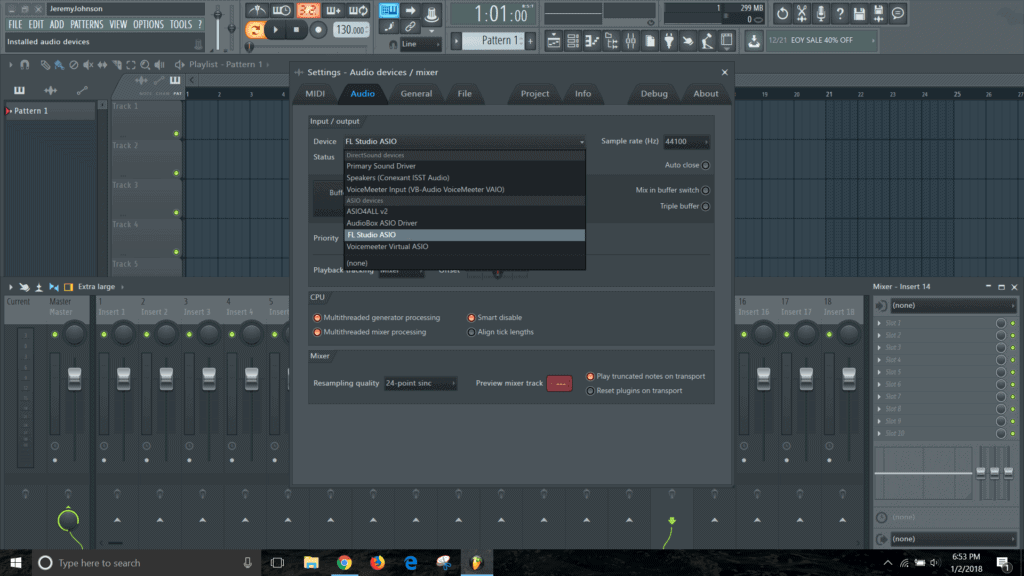
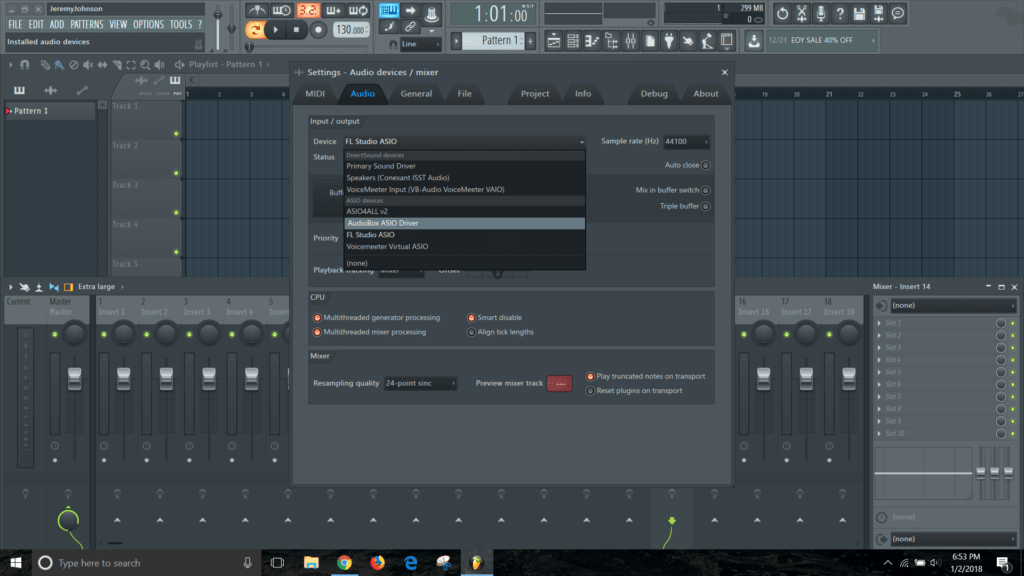
Look under the ASIO drivers section.
Find the driver that has some or all of the name of your audio interface.
I am using the Presonus AudioBox iTwo interface in this example.
The ASIO driver I see is labeled as AudioBox ASIO Driver. So I’ll select this option.
I don’t know all the technical details of ASIO drivers. So I’m not going to spend a ton of time trying to explain it.
If you want to get into the technical details of ASIO, you can start with this Wikipedia article.
Now let’s click on the buffer length option.
What I do know is that it was developed by Steinberg. And that’s enough for me.
Mine looks like this for the Presonus AudioBox iTwo:
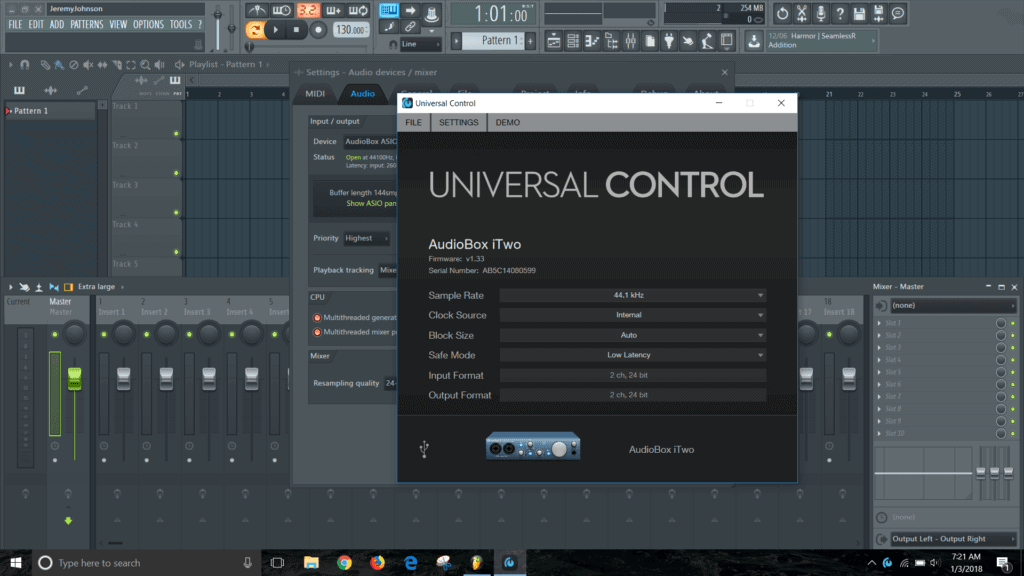
If you are curious what latency is, Presonus has a good overview article about audio latency.
Rule of thumb: when you are recording audio, the lower the latency, the better.
Set the latency as low as you can go.
Make sure you aren’t getting any glitches, crackles, pops, etc.
You will have to work that out by a little bit of trial and error.
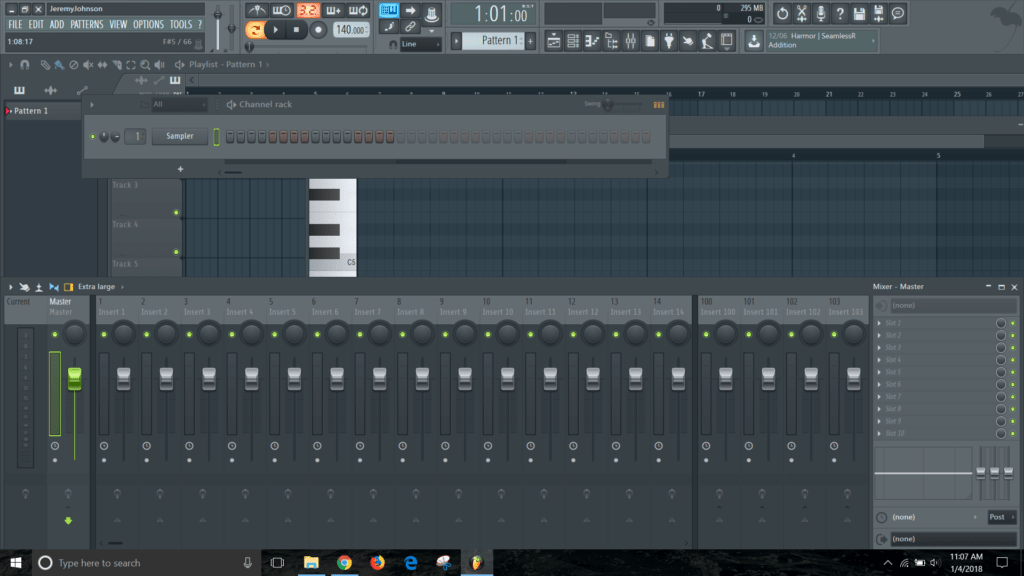
STEP 3 – SETTING UP THE MIXER FOR RECORDING AUDIO IN FL STUDIO
To open up the mixer in FL Studio, you press the F9 shortcut key.
It may look a little different than mine, but you should a window similar to this.
With a tracks that are labeled Insert 1, Insert 2, etc.
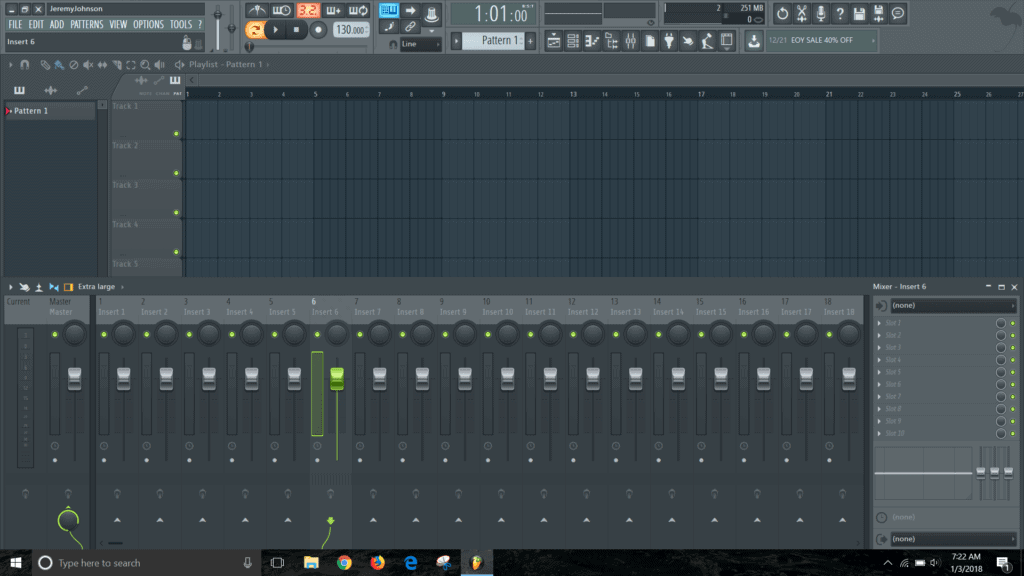
Select an empty track
Click on an empty track in your mixer. In my case, Insert 6.
To the far right of the mixer window there is the effects panel.
Choose the input from your audio interface
At the top and bottom of the effects panel you will see drop down menus.
The default selection is (none).
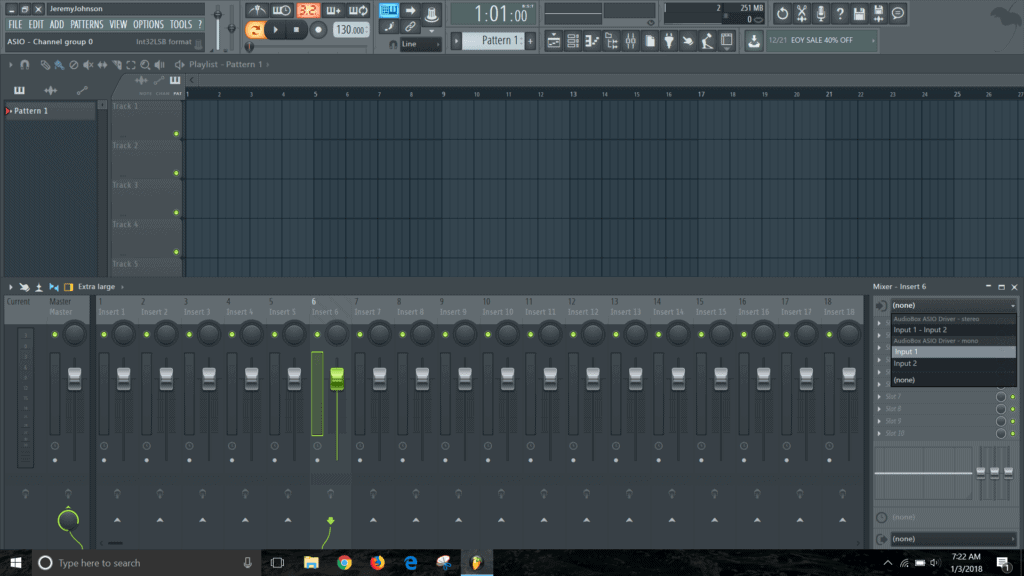
Left click on the top, drop-down menu. This is your input selection from your audio interface.
Select whatever input you have your microphone connected to.
In my case, I’m going to select input 1, like this:
When you do that, you should start seeing the audio meter in the mixer channel detecting sound.
You will see the meter responding as you speak into the mic.
It will look like this:
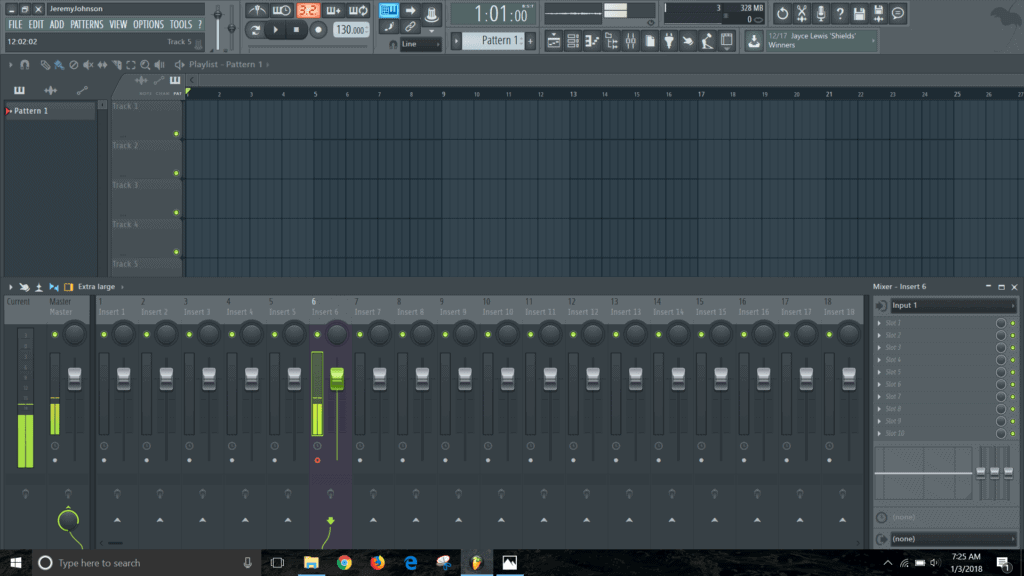
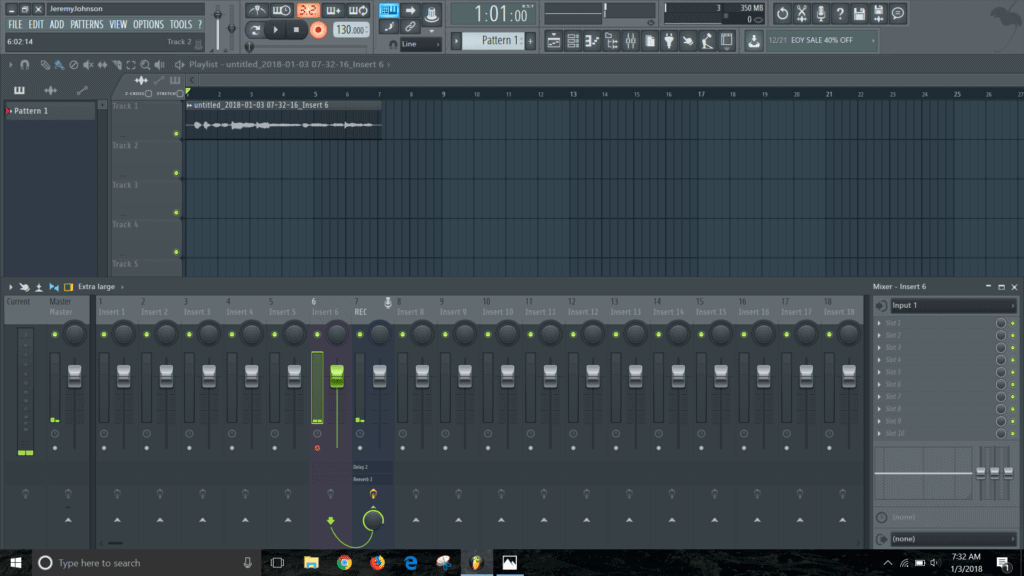
There is a button down at the bottom of the mixer track. A circle. As soon as you select the input on your interface, it will turn red.
Make sure the track is armed for recording
When it’s red, it’s letting you know that it is ready for recording.
You can see the red circle in the picture above on Insert 6.
To find out a lot more detailed information on the mixer window visit the FL Studio Mixer Explained page.
FILE LOCATION AND NAMING FOR RECORDED FILES
FL Studio will automatically select where to record file to and what to name it, if you do not.
But I like to be a little more organized with my projects than that.
I like to name files in a way that helps me when I come back to a project.
File names like vocal, or electric, or acoustic, etc. What can I say? I like simplicity.
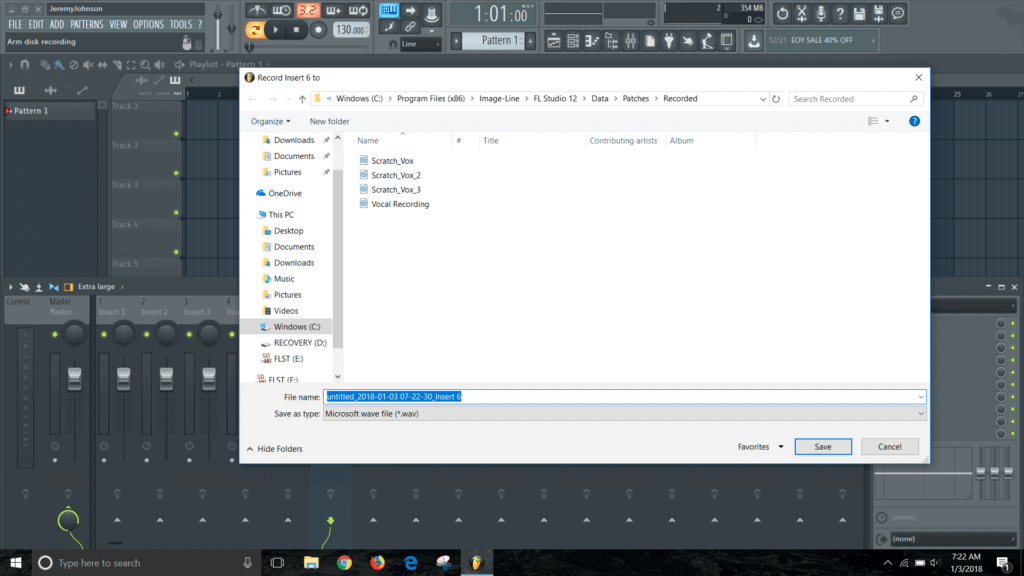
To be able to select the location you want to save the file and what to name it, right click on that red circle.
A folder will open up. This is where you are going to name that track that you will to record.
You can also select the location that you want to save the file.
The more organized you are with the recording the better.
It’s easier to come back to a project and pick up where you left off.
With file location and name set, you can start the process of setting the level of the microphone.
SETTING THE RECORDING LEVEL
There are lots and lots of opinions on this topic.
I won’t get into all the details, but one of the biggest traps for beginners is to record the audio as loud as you can get it.
This is not the smartest move.
AUDIO HEADROOM
The reason this is not a smart move is that you aren’t taking into consideration the steps that come after the recording process.
After recording, there are the editing, the mixing and mastering phases of a project.
Each track that you record at a high level adds up in your mix.
The more files you have in the mix, the faster those levels add up.
Plus you don’t have a lot of wiggle room to alter and manipulate the track you record with effects.
In my opinion it’s better to take a more conservative approach to recording your audio tracks.
Here’s what I mean by that.
Find a good level for the vocal
As you are setting your levels for your voice, watch the dB meter on your track.
You want the basic range of where those levels hit to be somewhere between -16 and -12 dB.
This is just a rule of thumb to follow when you are starting out.
It just helps you make sure that you are louder than the room noise.
But makes sure that you have some headroom to manipulate the audio after you record it.
Again, this is just a safe rule of thumb, this is not the gospel of recording by any means.
Setting up the transport controls
So once you have the track averaging at the right levels, then you can move up to the main transport control.
This is where you see the record button, play, stop, etc.
Right click on the record button and you will see a menu appear with a lot of options.
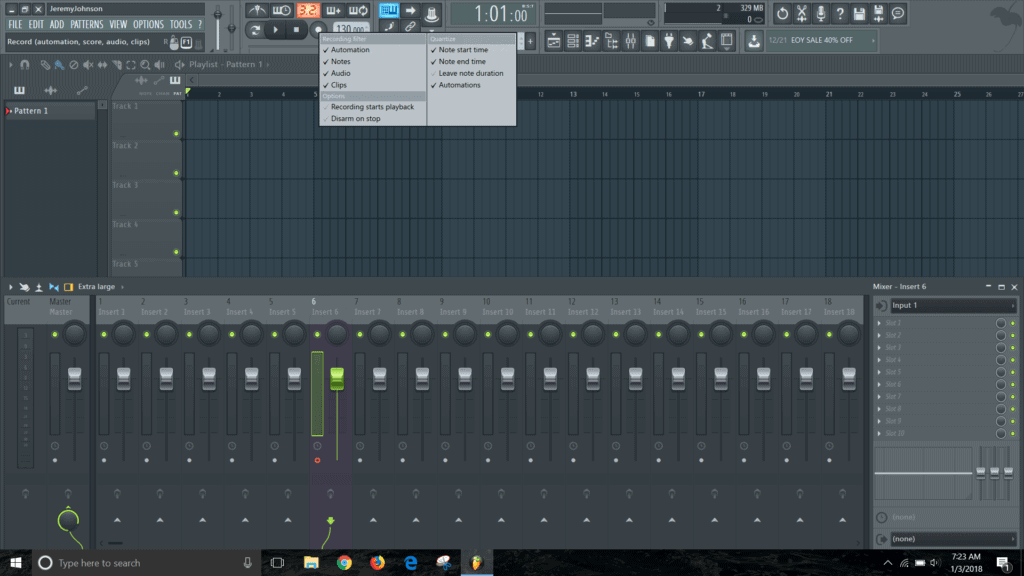
Since I’m recording audio, I want to make sure that option is checked.
You can uncheck or check any other option by right clicking on them.
This is usually how I set up the recording options when I am recording vocals:
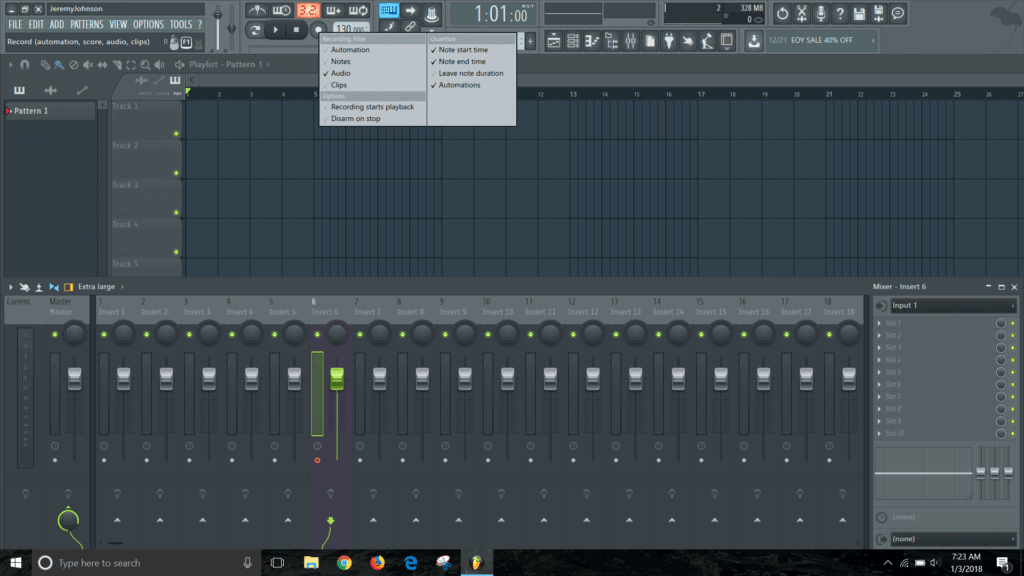
You may also want to select the option “Recording Starts playback”.
This just means it automatically starts recording when you hit record.
Otherwise you have to hit the space bar after you hit the record button.
SETTING UP HEADPHONE MIX TO RECORD
Put your headphones on and set the volume of the music that you are recording to.
Check to make sure that you can hear the vocals the amount that you want to hear.
this will be for the headphone mix, not for the recorded file. Balance that the way that you would like to hear it.
CHECK THE RECORD ARMING IN THE MIXER
Go back to mixer window.
Check to make sure that the vocal track is still armed for recording.
The small circle in the bottom of the mixer track should be highlighted in red.
SONG vs PATTERN MODE WHEN RECORDING
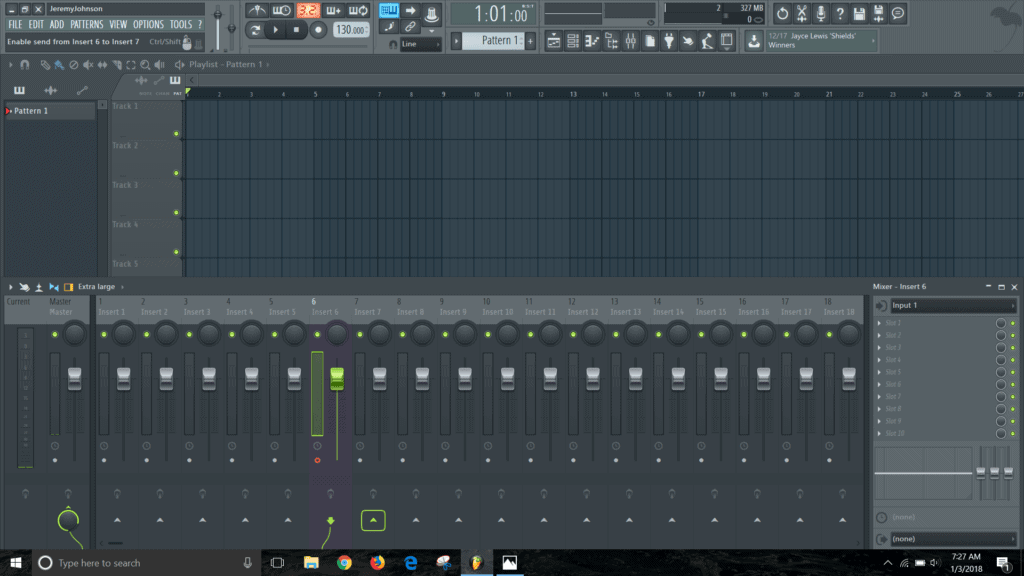
Look back at the transport bar in FL Studio.
Make sure that you are in song mode, not pattern mode.
Pattern mode is active when the button to the left of the play button is highlighted in orange like this:

YOU DO NOT WANT THAT PATTERN BUTTON TO BE ORANGE.
You want the SONG button to be green like this:

So now you are in song mode.
This allows the audio to be recorded onto the playlist. Just trust me on this.
I can’t tell you how many times I thought I had a great take, but no audio appeared on the playlist when I stopped recording.
I would frantically search around to see what had gone wrong only to realize later that I had been in loop mode.
So frustrating.
Now that you have setup everything, you get to the exciting part.
STEP 4 – Recording the vocal in FL studio
All of that set up work has led to this moment.
Now you get to actually record the vocal.
When you click on the record button in the main transport panel the first time, a menu is going to pop up, like this:
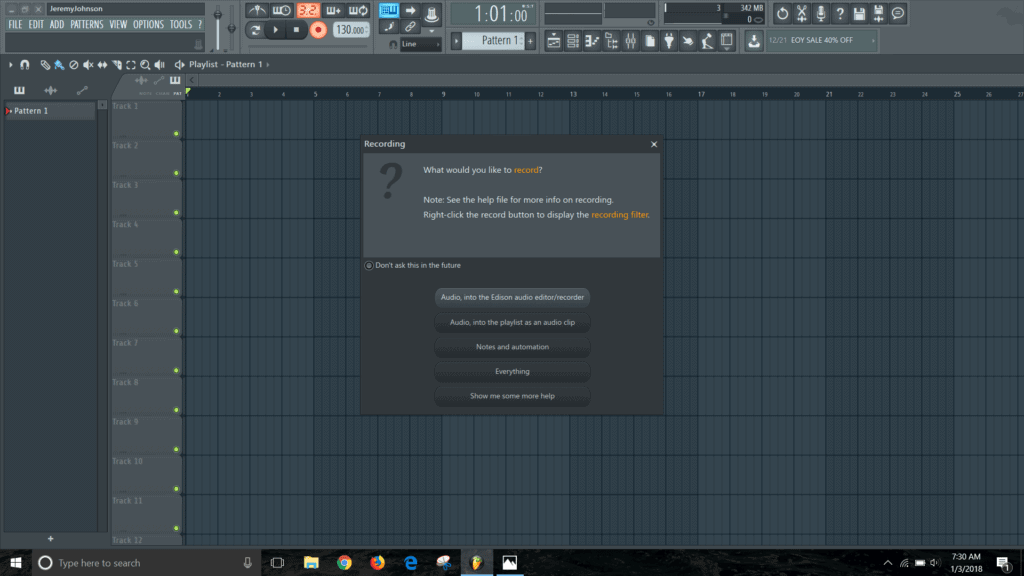
I select the button in the top corner that says “Don’t ask me this again in the future”.
Like this:

And then I click the option:
“Audio, into the playlist as an audio clip”
And the recording will start!!
Press stop when you are finished and you should see your audio show up in the Playlist like this:
Congratulations!
You now know how to record vocals in FL Studio.
It may seem like a lot at first. But once you do it 3 or 4 times, it feels more natural.
AGAIN, if you want to check out how I produce songs in FL Studio, check out my FREE course!
[thrive_leads id=’679′]